

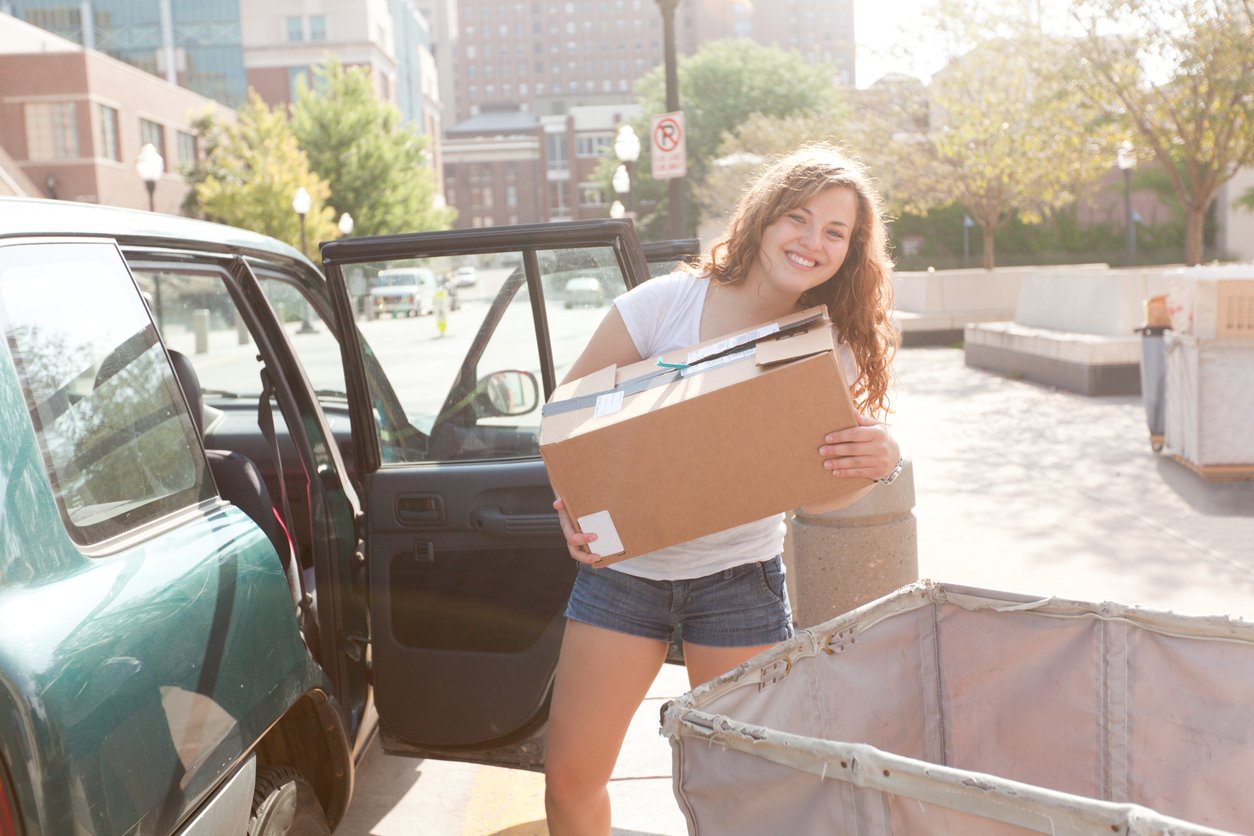
You’ve completed another year at college. Whether it’s your first college move-out or your fourth, moving out is a big step. You want to make sure that you don’t forget any critical details that could negatively impact your credit or lead to fines and fees next year.
Follow these steps to help ensure that your college move-out is successful.
Jump to:
Moving Out of the Dorms
Many students prefer to stay in the dorms, especially during their first year. However, living in the dorms usually means that you will have to head home for the summer. What seemed like an exciting task when you moved into the dorms at the beginning of the year may seem much more daunting when you’re getting ready to move back out again.
Fortunately, by breaking down those tasks into smaller pieces, you can make the moving out process simpler.
Step 1: Separate your possessions from your roommate’s.
Over the course of a year, many of your possessions may have ended up mixed in with your roommate’s — especially if you share clothing or purchased items like plates or a mini-fridge to share. Break down your possessions. Then you’ll know which items belong to which one of you and, therefore, who will be responsible for each item that needs to leave your dorm room at the end of the year.
Step 2: Break down your possessions by category.
Take a look at the possessions that have piled up in your dorm room over the course of the year. Then break them down into three key categories.
- Things you use regularly and will need over the summer or before your next big move. Your seasonally appropriate clothes and toiletries, as well as some leisure items, for example, are items that you will use regularly. Your books, on the other hand, might see a lot less use during the summer months.
- Things you will regularly use when you come back for the new semester but that you do not need right now. There are plenty of things in your dorm room that you won’t need again until the beginning of the next school year. Chances are, you won’t need your textbooks over the summer. If you’ll be living at home or in other accommodations for the summer months due to traveling or volunteering, you might not need your XL twin-sized sheets and other bedding, your towels, or the mini-fridge. Those items can be packed up and tucked away neatly. Then they’ll be easy to pull back out at the beginning of the next school year.
- Things you no longer want or need. At the beginning of the year, your dorm room was neat and organized. It was filled with only the things you were sure you would need. By the end of the year, however, you may have accumulated a lot of things that you don’t really need or want. You might have souvenirs from adventures you took over the last year that are just gathering dust, clothing items that didn’t fit quite the way you wanted them to, or impulse purchases that you never really used or needed. Don’t pack those items up to take them home with you or pay for storage for items you don’t need. Go ahead and discard those items.
Are you moving on to a new career or launching out into the world without plans to come back for another year of college? Then your “things you no longer want or need” pile may be larger than the pile belonging to someone who has three more years left in the dorms. You may want to reach out to younger students and offer them those items, especially if you know someone who needs them!
Step 3: Consider your storage needs.
What are you planning to do with the items that you don’t need over the summer? Can you take those items home with you and store them with your parents? How are you planning to get them there? If you need to fly home or have a small vehicle, you may not have the ability to come in with a big truck and load up everything that has been in your dorm over the summer months.
Many college students choose to store their things during the summer in the same city as their university. It’s easier than trying to pack everything up and move it home. Neighbor is an optimal solution for summer college storage. Instead of turning to pricey traditional storage facilities, more and more students opt for storing with Neighbor. Neighbor offers more convenience in terms of location, making it easy to find a secure storage unit very close to the college. You can also choose a month-to-month option with no contracts. So you can easily store your items when you’re not using them, then pick them up at the end of the summer and move them into your new dorm or apartment without getting stuck in a contract that will have you paying fees for the rest of the year.
Make sure you choose the right size storage unit for your needs. In most cases, as a college student, you can fit most of your possessions in a 5′ x 5′ storage unit or a 5′ x 10′ storage unit; it’s the perfect size for storing boxes and furniture from your dorm.
Pro Tip for Your College Move-Out Plan:
Try to make your storage unit arrangements well in advance of your college move-out date. Find cheap college storage conveniently by using Neighbor. If you wait until the last minute, you may have a harder time finding the ideal storage unit. You may even end up paying premium prices for the unit.
Step 4: Start packing.
Pack up the possessions that you don’t need anymore first — ideally, well in advance of your college move-out day. This may mean removing items like:
- Wall decorations
- Out-of-season clothing
- Dishes and utensils that you don’t use regularly
- Extra sheets, towels, and other linens
- Books you no longer need for your classes
Go ahead and give away unwanted items, unless they’re items that you need before the end of the semester. Are you struggling to figure out how to pack up your home? The ultimate guide to relocating your home can help.
Step 5: Consult your RA for the dorm’s move-out checklist.
Your RA likely has a checklist that will provide you with all the critical information related to your college move-out day. It will contain vital information like:
- Cleaning tasks you’re expected to take care of before you leave the dorms
- The location of any needed cleaning supplies, the dumpster you’re expected to use, etc.
- Move-out dates
- Where you need to hand in your keys or other items
Divide cleaning responsibilities for your college move-out day with your roommate. Some dorms may have policies that state that you can’t leave until basic cleaning tasks are taken care of. Others may make the last person in the room responsible for specific tasks, like turning in the keys. If your roommate is relatively responsible and has followed the rules in the past, you may be able to leave some of those critical tasks in his or her hands. On the other hand, if you know your roommate won’t take care of those tasks, you may need to make arrangements to be sure they’re taken care of. Let’s face it. You’ve been living with them for a year, so you probably have a pretty good idea of what they will and won’t do!
Step 6: Make transportation arrangements.
Once you know your official college move-out day, you can work backward to figure out when you need to take your items to storage and when you need to transport your items home. If you need your parents to come pick you up, rent or borrow a truck, or arrange for a moving truck, make sure you schedule that well in advance!
Step 7: Get rid of any trash in your dorm room.
It’s time to say goodbye to the collection of bottles stored under your bed and the pile of papers that’s somehow accumulated on your desk. Throw away those moldy items accumulating in the back of the fridge. Taking the trash out can make it easier to see what still needs to be done before you can get out of your dorm. Continue to throw away any trash as you make it or come to it for the rest of the semester.
Step 8: Return any items that belong to the university.
Do you have library books still sitting on your desk? Uniforms for a sports team or club? Sporting equipment? If you’ve borrowed or rented any items that belong to the university, return them before the end of the semester if possible. Then you won’t find yourself with expensive fines and fees that you have to deal with when you return to campus in the fall.
Step 9: Return rented items.
Did you rent items from local providers, including your mini-fridge? Make sure they get picked up before your college move-out day.
Step 10: Collect items across the campus.
Before move-out day arrives, make sure you collect any items you have left somewhere on campus other than your dorm room. For example, do you have items stored in the locker room that you need to clean out and take home? Items that you typically leave in a friend’s dorm because that’s your favorite place to hang out? Make sure you pick up all of those items before your college move-out day arrives.
Step 11: Sell back your textbooks.
Once classes are over for the semester and you no longer need your textbooks, sell them back to the campus bookstore. Alternatively, you can sell them on Amazon. Keep only the books that you might have a use for in the future.
Step 12: Finish packing.
As your college move-out day approaches and the semester winds down to a close, finish packing up your possessions. Get them ready to move out. IKEA blue moving bags are a great way to pack and store a lot of your possessions. If you’re keeping items in storage over the summer, make sure you seal and protect them before heading out.
Step 13: Take your items to storage.
If you’re planning to place your items in storage, make the trip a couple of days before you officially move out. This will leave you with fewer things left to do on your official college move-out day list.
Step 14: Complete any final cleaning tasks, turn in your keys, and head out!
Make sure you take care of all the items on your check-out list from your college or university, then head out! It’s time for your next adventure to begin.
Moving Out of a College Apartment

Moving into a college apartment offers you a lot more freedom. You won’t have to adhere to dorm curfews, and you have a lot more privacy. Also, you get to pick your roommates. Even better, you’ll get to have a lot more of your own stuff on hand — and a lot more freedom to choose your furniture and decor. If you’ve spent time in the dorms, a college apartment may seem like a dream come true!
Not everyone, however, plans to hang around their college apartment for the summer. Whether you need to pack up your possessions so that you’re sure your roommates won’t mess with things that don’t belong to them in your absence or you don’t plan to return to your apartment after this semester, make sure you’re prepared for your college move-out day with this handy checklist.
Step 1: Check your lease.
In many college towns, you can sign a lease that will secure your apartment for the duration of the school year. You won’t have to worry about breaking your lease if you want to go home for the summer. In others, however, you may be locked into paying for your apartment — even during the summer months. Also, you may not want to let your apartment go if you intend to move back in next year.
Check the terms of your lease and know what you’re responsible for. You may also want to take a careful look at your college move-out date to ensure that you don’t end up paying for an extra month on your rent when you only need the apartment for a few extra days. You may be able to negotiate with your landlord to get the time you need. But you’ll have the best luck if you do it well in advance.
Step 2: Provide your notice.
Make sure you’ve given written notice to your landlord of your intent to move out. If you have roommates, it might be a good idea to provide them with that information, too. Keep in mind that in some cases, your lease may govern how soon you have to provide that intent to move. It could be as much as 90 days before your intended move-out date.
Step 3: Plan for what you’ll do with your possessions.
Where are you headed as you move out of your college apartment? Are you moving out for the summer with plans to move into a new apartment for the coming school year? Do you need to move in with your parents temporarily, but you intend to move back out on your own again soon? Take a look at your possessions and consider where you will store them.
In many cases, you may need a storage unit that will allow you to store furniture, kitchenware, and other items that you might not need while you’re living at home but that you’ll certainly need again when you’re ready to move back out on your own. Not only that, you need to figure out how you will move your possessions. Do you need a moving truck? Friends to help move you out? You may want to get in touch with trusted individuals or a moving company early before their commitments fill up.
Neighbor can help you find the storage unit you’re looking for in the right neighborhood. For example, if you’re planning to come back to college or you’re pursuing a job in your college town that will begin in a few months, you may want to choose a storage unit that’s local to your college. On the other hand, if you’re moving home after graduating and you aren’t sure where you’ll be headed next, you may want to choose a storage unit in your hometown, close to your parents or your current destination.
Make arrangements for storage and moving services as early as possible. If you wait until the last minute, whether you’re looking for a storage unit in your college town or closer to home, you may have a much harder time finding one! Refer to the Ultimate Moving Checklist to help you start planning out your move as early as two months before your moving day.
Step 4: Start sorting your possessions.
You can start packing weeks before you actually move out of your apartment. Start by separating out anything that belongs to any roommates you may have shared space with. Next, decide what you’ll do with communal possessions. Then, divide your possessions into these piles.
- Things to keep but not use immediately. There are many possessions in your apartment that you will want or need to keep for later: your bedding, towels, clothing, and kitchen items, for example. Pack the items you won’t need until your move ahead of time. Then pack items that you regularly use as you get closer to the big day.
- Things you will need immediately or over the summer. You may want to keep some items handy through the summer months or while you’re in that interim location before you move to your next permanent home. Those items need to be packed in an easily identifiable, clearly accessible location. Then you’ll remember that they need to go with you after you move out.
- Things you no longer want or cannot take with you. If you’re moving out of your college apartment for the last time and planning to settle across the country, you might not want to take your furniture with you. Make arrangements to sell or donate it. Throw away items you no longer want.
Get in the habit of packing as you realize you no longer need items. Often, this can make it much easier to handle those final packing challenges when your college move-out day arrives.
Step 5: Fix any problems with the apartment.
Remove nails and screws from the walls and fill the holes with putty. Replace any loose knobs or burnt-out light bulbs. Scrub any stains that you’ve been ignoring, especially during finals. Ideally, you want the apartment to look as good as it did when you moved in — or, if possible, even better.
Step 6: Take care of all necessary cleaning tasks.
Cleaning up an apartment is an unfortunately necessary part of the college move-out process. If you fail to clean it up properly, you may find that you end up losing part or all of your deposit. That’s money you may need to help you move into your next home! As you take care of that final clean-up, include:
- The oven
- The burners on the stove
- Under the fridge and cabinets
- The floors
- Inside kitchen cabinets
The better the apartment looks, the better the likelihood that you will get your deposit back!
Step 7: Forward your mail.
If you have any mail coming to your college apartment, now is the time to forward it to your new address. Sending it to your parents’ place could be the ideal solution if you aren’t yet sure of your new address.
Step 8: Finish packing.
Before your last day in the apartment, finish packing. Distribute any items that need to go to other people or places. This includes items that your friends have indicated that they want to items that you rented for the duration of the semester and need to turn back in. Make sure you turn in any library books or supplies that belong on campus. If you can, transport items that you intend to leave in storage ahead of time to clear the way for your final move-out tasks.
Step 9: Do a final walk-through.
Take a walk through your apartment and consider any final tasks that you may have left undone. For example, are there any items hiding in the back of the cabinets or in the bathroom that you need to go ahead and move out? Any damage that you need to take care of? That final walk-through can reveal a variety of potential problems and prevent them from becoming more serious concerns.
As you take that final walk-through, take pictures of the apartment and the condition you’re leaving it in. If your landlord does try to withhold your damage deposit, you’ll have photo evidence of the condition of the apartment when you left.
Step 10: Turn in your keys.
Once you’ve moved everything out of your apartment and you’re sure that it’s clean and ready to go, turn in your keys to your landlord. It’s time to head off on your next great adventure!
Moving out of a college dorm or apartment can seem daunting. By following this checklist, you can ensure that you don’t miss out on any important steps. Staying organized can increase the odds that you’ll get your deposit back and decrease your stress levels as you manage your college move-out day.
Additional Moving Resources:
Moving and packing guides
- How to Move a Couch
- How to Move a Mattress
- How to Move a Refrigerator
- How to Move a Piano
- How to Move a Pool Table
- How to Pack Shoes for Moving
- How to Pack Dishes and Glasses


