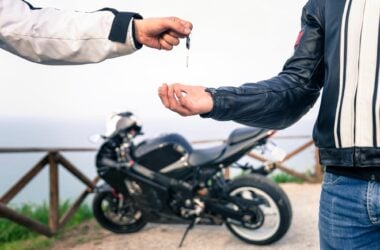
In a world of self-driving cars, keyless entries, and automatic transmissions, the simple art of how to ride a motorcycle is fading into history. But the lure of the open road remains–and you want to chase it.
The problem is that all the talk of first gear, second gear, clutch, throttle, front brakes, and so on can make operating a motorcycle sound daunting–especially if you’ve never even ridden as a passenger before. So, how much skill is involved exactly? And what kind of training will you need?
Truth is, there are some things you have to learn by doing–and riding a motorcycle is one of them. But that doesn’t mean you shouldn’t at least try to get a handle on some of the terminology. That’s what we’re here for.
Key Takeaway
- No amount of knowledge replaces practice. The best way to learn how to ride a motorcycle is to take an MSF Course in your area. (Note: When attending this course, you won’t need gear or even a bike of your own. They provide that for you, in addition to teaching you the basics).
Step #1: Gear Up for Safe Riding
You aren’t ready to twist that throttle or feel the wind in your face until you have the proper motorcycle gear.
As a rider, your gear is your armor. It protects you from wind burn, the gravel flying off the dump truck ahead of you, and the pavement beneath you–should you come face-to-face with it in an accident.
Your safety gear should include:
#1: A Helmet:
True, many states don’t legally require you to wear a helmet. But with all the reckless drivers out there, are you really willing to leave your life in their hands?
It doesn’t matter how good a driver you are if the other guy isn’t paying attention. With this in mind, invest in a motorcycle helmet like this one.
#2: Gloves:
Are they really that important? Take a drive without them, and you’ll see why you should never ride without gloves (like these).
You see, there are small particles in the air that we don’t see with our eyes. Sand, dust, and pollen are all innocuous at normal speeds. But when you’re driving 50 mph, those particles feel like a sandblaster against your skin. Not cool!
#3: Boots:
Your boots serve a dual purpose. They provide the proper traction to keep your feet from slipping and are a protective layer in case you wipe out. It’s better for your boot to skid across the ground than your ankle.
Don’t have a pair of riding-friendly boots? Check out these.
#4: Motorcycle Pants and Jacket:
Ever wonder why black leather was always associated with biker gangs? Well, that’s because leather is tough. At the time, leather was the best material to protect against flying particles on the road and to prevent you from getting scraped up in the event of a crash.
Even now, leather is a good abrasive-resistant option, but there are also Kevlar-reinforced jackets, which are much better. Check out this option if you’re still shopping for the right leather jacket.
The road is unpredictable. By wearing the proper safety gear, you protect yourself from…less capable drivers.
Step #2: Run a Quick Check
There are six main areas of your bike that you should check everything before you take a ride.
T – Tires and wheels
Check your air pressure and tire tread. Make sure your front wheel brake is functioning, and check the pads on your rear brake as well. Be sure the wheel rims aren’t bent, and the spokes are clear.
C – Check the handlebars.
Work the front brake lever and pedals, and visually inspect all hoses and connections.
L – Lights and Electronics
Switch on the lights and turn signals. If your blinkers don’t work, be sure to use hand signals when turning.
O – Oil and Fluids
Just like when you’re driving a car, you want to be sure you have enough gas to get you where you’re going.
C – Check the Frame and Suspension
Once you’ve mounted the bike, make sure it feels right with no extra squeaks or creaks. This should include a visual inspection of the chains to make sure everything is clear.
A good safety check takes less than five minutes before you start up your bike, so stay safe and keep your bike in good shape.
Step #3: Get on It!

Finally, it’s time to get on your bike. If you’ve ridden a regular bicycle before, this is easy.
You plant your foot firmly next to the bike, grip the handlebars, and swing your right leg up behind you and over the bike.
Congrats! You’ve mounted.
(Obviously, if you’re left-handed, complete this step the other way around to avoid feeling awkward.)
An important note about fit: if your toes barely touch the ground (and you have to lean from one side to the other to feel in control of your bike), you need a different fit. You should be able to rest both feet flat on the ground for maximum control.
Step #4: Start Your Engines
Most bikes nowadays have an electric start, so you just press a button. But some bikes have a safety feature called a kill switch. If the kill switch is pulled when you’re riding – say if you get thrown from your bike – then your bike will automatically shut off.
So if your bike has a kill switch, make sure you have that engaged.
Step #5: Engage Brakes
As bikes use a manual transmission, you’ll start in first gear, so engage your brakes, put it in neutral, then turn the throttle to rev the engine and give it some gas.
Once it’s purring, you’re ready to go.
Step #6: Get Going!
Now, you can let off the brakes, open the throttle to give the engine some gas, release the clutch, and shift down to first gear.
For new riders, who have never driven a manual transmission, shifting gears is the most confusing part. And that’s mainly because the more you try to explain it to someone, the more opaque it gets.
Shifting gears is something you have to learn by doing. You get a feel for when to shift to second gear, when to give it gas, when to release the clutch, and when to engage the clutch.
That’s why, as a new rider, the best thing you can do is find a buddy who knows how to ride a bike, go to an empty parking lot, and start riding!
Step #7: Learn How to Stop
On a motorcycle, you have two brakes: the front tire brake and the rear wheel brake. The front wheel is controlled from your right handlebar—sorry, lefties—just like on a bicycle. The rear brake is the pedal on your right side.
If your goal is to decrease your speed all the way to a stop, you want to pull and press these breaks together gradually.
If you pull the front brake without pressing the rear, you could flip your bike. So take it slow and practice that process until it’s second nature.
Step #8: Practice How to Turn

Keeping your throttle steady, look through the turn to where you’re going.
Note that your bike naturally leans when it turns because…physics. So be prepared for it, and don’t fight it. Lean into the turn with your bike to keep your balance.
Step #9: Learn the Law
Motorcycles have some specific laws to obey and other rules that are just smart. As an example, learning how to position yourself in a lane to remain visible to cars around you is a skill you should learn.
You should also learn the hand signals for stopping and turning in case your lights stop working. This is another reason why motorcycle safety courses are a good idea.
Enrolling in a motorcycle safety course, like those offered by the Motorcycle Safety Foundation (MSF), provides a structured environment to learn the rules of the road, the subtleties of bike handling, and the life-saving practices of defensive riding.
Summary
Now once you’ve learned how to ride your first motorcycle, you also need a place to store that motorcycle.
Think about it. Your bike is not a small investment. So where are you going to store it? Do you have a place that’s out of the weather and secure against theft?
Your home garage is always an option. But if you already have two cars parked in your two-car garage, it’s a tight fit.
Thankfully, there’s a way to store your motorcycle close to home – without tossing it in the backyard or shoving it between your daily drivers.
Neighbor is a peer-to-peer vehicle storage marketplace where you’ll find vehicle storage options in your own neighborhood (available in all 50 states) at prices 50% lower than traditional motorcycle storage options.
It’s convenient. It’s safe. It’s affordable. It’s Neighbor.
Frequently Asked Questions
How Easy Is It to Ride a Motorcycle?
Once you learn the motorcycle controls, riding a motorcycle is not as difficult as it may seem. If you’re already comfortable on a bicycle, you’re halfway there.
What Is the Most Important Piece of Safety Gear for Motorcycle Riders?
The most important piece of safety gear for motorcycle riders is the helmet, as it offers comprehensive protection for the head and neck. When choosing a helmet, it should meet safety certifications like DOT and ECE.
What Should I Check During a Pre-ride Inspection?
During a pre-ride inspection, you should check your tires, wheels, lights, fluids, battery, chain, brakes, and mirrors to ensure your motorcycle is safe to ride. It’s important to use the T-CLOCS checklist for a thorough inspection.
Is It Necessary to Take a Motorcycle Safety Course?
Taking a motorcycle safety course is highly recommended as it provides structured education on safe riding techniques and laws, even though it may not be legally required.