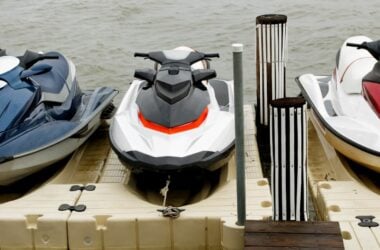
You wouldn’t take a car directly out of storage and onto a long road trip. For the same reasons, you shouldn’t rush your jet ski into the water after it’s been sitting all winter.
Even a properly winterized jet ski should be checked over for any mechanical or safety issues before it’s sea-worthy. This process is known as the de-winterization process.
De-winterizing your jet ski is a fairly straightforward process, and easy for DIYers and first-time jet ski owners. In this step-by-step guide, we’ll give you all the tools you need to confidently bring your jet ski back to life from the off-season.

What is De-Winterization?
De-winterization is the process of prepping your jet ski for the summer months and doing regular maintenance to ensure it’s in peak condition.
During the winter season when your jet ski is in storage, a few things can happen. The battery can start to lose its charge, seals can dry out and crack, or electrical connections can start to corrode. Properly winterizing your PWC (also known as a “personal watercraft”) can help avoid some of these issues, but it’s still important to look for any potential issues as you’re de-winterizing.
As you’re de-winterizing your jet ski, check the battery, engine, and other mechanical components, as well as the trailer that you use to transport the jet ski. You’ll also want to give any safety equipment that’s on board, such as life jackets and a fire extinguisher, a quick once-over.
Why De-Winterize?
Inspecting your jet ski during the de-winterization process not only bolsters its performance but also keeps you and others safe on the water.
Properly de-winterized jet skis are less likely to experience engine problems, leaks in the cooling lines, or other issues that could put a damper on your fun-filled day. Plus, performing regular maintenance will reduce your time spent preparing for winter next year!
De-Winterization Checklist for Your Jet Ski
When you pull your jet ski out of winter storage, there are a few steps you need to take to properly de-winterize your craft. These include:
- Testing the battery and replacing it as needed
- Checking fluid levels and topping them off
- Replacing spark plugs and checking the electronics
- Inspecting the hull and greasing the engine bay
Let’s dive into how to de-winterize a jet ski in four simple steps:
Step 1: Battery Care and Installation
Proper battery care and installation are critical to a successful de-winterization process. After a long winter of storage, the battery may have lost some of its charge or even become corroded. The first step to a hassle-free first ride of the season is to test and charge your battery.
Test the Battery
Set your battery tester to 15 or 20 volts and connect the red lead to the positive terminal and the black lead to the negative terminal. Most jet skis use a 12-volt battery, so your reading should be between 12 and 13 volts.
Charging the Battery
If your battery reads less than 12 volts, you can use a smart charger to charge, monitor, and maintain your battery’s life.
Charging may take a few hours, depending on how depleted your battery is.
Test the battery again after charging, and a few days after charging, too. If your readings are still under 12, it’s time to replace the battery.
Installing a New Battery
Make sure you check your owner’s manual before you purchase a new battery. Most jet ski and sea doo batteries will run you about $50 to $100.
To properly install your new battery, attach the red cable to the positive terminal first, then attach the black cable to the negative terminal.
Step 2: Fluids Check and Replacement
Over the winter months, the fluids in your personal watercraft may start to degrade on a molecular level or leak out due to cracked hoses and gaskets.
Changing your fluids during de-winterization can improve performance and reduce the chances of engine damage.
Engine Oil and Filter Change
Ideally, you should perform a filter and oil change at least once a year, or as recommended by your jet ski’s manufacturer.
If you changed your oil during winterization, take this time to check for low oil levels, which might indicate a leak. To change your oil and filter, first check your owner’s manual for the correct oil grade.
Typically, 4-stroke jet skis require 10W-40 engine oil, which costs around $10 a quart.
Coolant Check
Always check the coolant level when the engine is cold. Coolant expands when hot, so if you overfill the coolant while it’s cold, you’ll leak coolant in the engine bay when it heats up.
Make sure to use the appropriate type of coolant, preferably the same brand/type you used last time. When different types of coolants are mixed, they can create a gel that clogs the cooling system.
Fuel System Preparation
Start by draining any old fuel left in your jet ski from the previous season and adding fresh fuel to the tank. To clean out any deposits or build-up in the fuel system that may have formed while the jet ski was idle, use an approved fuel stabilizer or gas treatment.
Sea-Doo makes a specialized fuel treatment (XPS fuel treatment) for around $10, and other manufacturers do the same.
Step 3: Spark Plugs and Electrical Connections
Over time, spark plugs can become worn or corroded, potentially leading to engine problems and reduced performance. Additionally, electrical connections can become corroded or damaged, impacting the overall functionality of your jet ski.
Replacing Spark Plugs
Ideally, you should replace your spark plugs annually, so if you didn’t replace the spark plugs during winterization, now is the perfect time to do so. Remove the old plugs with a spark plug socket wrench and replace them with new ones, following the manufacturer’s recommendations for proper gap size and installation.
You can typically change the spark plugs in an hour or so, and replacement plugs are only a few dollars apiece.
Checking the Wiring
If your jet ski had any kind of internal fluid leak, it may have started to corrode your electrical connections. Check that your dash display completely lights up and that the headlamps turn on. Then, examine the wiring harness. Most jet skis have onboard engine control computer systems, so damaged wires will impact the overall functionality of your machine.
Step 4: Hull Inspection
Once you’ve completed all the mechanical maintenance on your personal watercraft, you should perform a hull inspection and coat your components in grease to prevent accelerated wear and tear.
Drain Plug and Hull Inspection
Ensure that the drain plugs are firmly in place so that no water gets inside the hull while you’re out on the water. If your plugs seem worn or cracked, replace them.
You can buy OEM or aftermarket drain plugs for around $10.
Additionally, inspect the hull for any signs of damage, such as cracks or dents, especially if you’ve been using your jet ski in saltwater.
You should always wash your jet ski with freshwater and marine soap after use, and before heading out for your first ride.
Sacrificial Anode Check
Sacrificial anodes help prevent metals that are underwater from corrosion. Check the anode at least once a month and replace it when it’s 50% depleted. A worn or corroded sacrificial anode can lead to steering or reverse issues, so ensuring its proper functioning is vital for a safe and enjoyable time on the water.
Replacement anodes from the manufacturer are only around $15.
Apply an Anti-Corrosive
The final step to successfully prep your jet ski for the season is to apply a coat of grease or anti-corrosive agent to the entire engine compartment. XPS or Fluid Film are two products that are designed to protect your plastic, rubber, and metal components from rust, especially if you’re riding in saltwater.
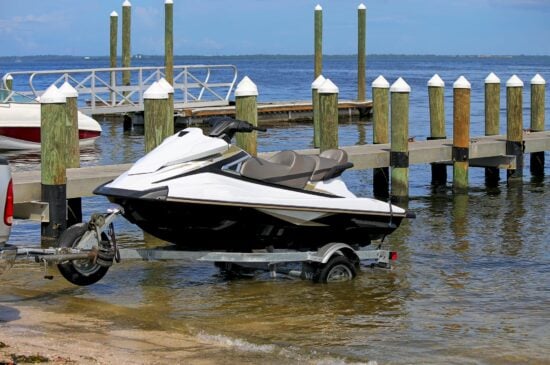
Step 5: Trailer Maintenance
De-winterization should not only include the jetski itself but also all auxiliary equipment, such as your trailer. A faulty brake light or low tire pressure might put a damper on your weekend plans, so giving your trailer a once-over is essential.
Here are a few key considerations for de-winterizing your jet ski trailer:
Check Your Tire Pressure
Tires often lose some pressure over winter, so make sure your levels are within the acceptable range. Normally, trailer tires should not exceed 90 PSI, but you should check your load range chart or tire wall to be sure.
Test Your Brake Lights
Hook your trailer up to your vehicle, and test whether all the brake lights work. If not, you might have a dead bulb or a wiring issue.
Many people forget to double-check their trailer lights and end up getting pulled over if their brake lights are faulty!
Check Your Trailer Registration
In most states, you must register your trailer with the motor vehicle authority. For example, in Pennsylvania, trailer registration is good for up to two years.
Make sure your trailer is up-to-date and your license plate is clearly visible.
The Best Way to Store Your Jet Ski…
Everyone with a personal watercraft should take the time to de-winterize, but how you store your jet ski will determine how intensive your maintenance will be. If you store your jet ski in a temperature-controlled environment, you’re less likely to have cracked seals or battery issues.
One of the best ways to store your summer watercraft is to use a peer-to-peer storage marketplace like Neighbor. You can find affordable, safe storage solutions in your area for your jet ski or boat. Storing with a vetted host can keep your personal watercraft safe from the elements and reduce the cost of de-winterization.