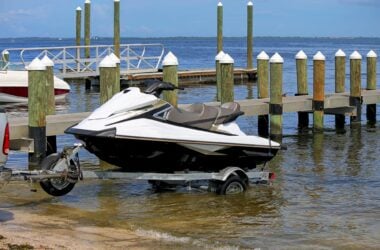


A jet ski that sits through winter unprepped is one hard freeze away from a cracked cooling line or a fuel tank full of gummed-up gas.
Because open-loop and closed-loop systems need different care, we’ve broken down the process into nine steps, so you’ll know exactly which ones apply to your ride before the temperature drops.
How to Winterize a Jet Ski in 9 Steps
Some steps stay the same no matter what type of jet ski you own. Others depend on your engine, cooling system, or how long your jet ski will sit in storage.
Here’s what to run through in order:
1. Drain the water
Water left in your jet ski’s cooling system can freeze and crack it once the temperature drops. That’s why this step comes first.
Tilt your jet ski so the front sits higher than the back. Start the engine and let it run for 20–30 seconds at a time, giving the throttle a few pulls to push water through the system.
Turn the engine off between rounds so it doesn’t overheat, then repeat until no more water comes out.
Remove the drain plugs from the hull once you’re done. Leftover water can pool in the bilge and freeze there, too. A shop vac or towel can clear out water from spots you can’t reach.
2. Prep your cooling system
Check your owner’s manual to confirm which type of cooling system you have, since open-loop and closed-loop systems need different prep:
| 🔓 Open-loop | 🔒 Closed-loop | |
| How it cools | Pulls water straight through the engine | Uses coolant for the engine block, raw water only for the exhaust and intercooler |
| Do you need antifreeze? | Likely not | Likely yes, for the raw water side |
Your manual will have exact details, but here’s what to plan for if you have an open-loop system:
- Attach the flush hose: Connect a garden hose to the jet ski’s flush attachment. Start your engine before you turn on the tap.
- Run the water: Let it flow through for 10–15 minutes.
- Clear it out: Turn off the water, then throttle in 10–15-second bursts.
- Finish the drain: Raise the nose slightly on the last round.
For a closed-loop system, check the label on your antifreeze. Concentrate typically calls for a 50-50 blend with water, but pre-mixed antifreeze goes in as-is.
Once you know what you’re working with, start your engine and:
- Run it through: Send the mixture or pre-mix through the raw water side.
- Check the exhaust: Watch for clear flow before you shut it down.
⚠️ Important: For either system, start the engine before you add water or antifreeze, and stop the flow before you shut off the engine. Getting that order backward can force water into the engine and cause damage.
3. Stabilize or drain the fuel
Old gas left sitting all winter can break down and gum up your fuel system. You’ve got two ways to prevent that:
| 🪣Stabilizing and filling the tank | 🌀Draining completely | |
| Best for | When you’re storing for a few months and riding again next season | Long-term storage, or facilities that require an empty tank |
| Why it works | Less room for condensation to form in the tank | Removes the fuel before it has a chance to break down |
| Watch for | Accidentally skipping the stabilizer | Condensation and rust, even in an empty tank |
Check with your storage facility or host first, since some require an empty tank before you move a vehicle in. Check your owner’s manual, too, since some manufacturers recommend one method for a given model.
If you’re stabilizing:
- Fill up the tank: Top it off completely.
- Add stabilizer: Use the amount that the label recommends for your tank size.
- Run the engine: Idle for about 10 minutes so the stabilizer mixes through the system.
If you’re draining the tank:
- Drain the fuel: Empty it thoroughly.
- Protect the interior: Add a small amount of fogging oil, and tilt the tank so the oil coats the inside.
4. Change the oil
Running a 2-stroke engine? Skip this step because 2-strokes burn oil mixed with fuel instead of storing it separately, so there’s no reservoir to drain.
Old oil holds onto moisture and contaminants that build up over a season of rides. Left in the engine all winter, it can lead to corrosion you won’t notice until spring.
Warm up the engine first, either by running it briefly or by tackling this step right after your last ride, while the engine’s still warm. Warm oil drains faster and carries more of that leftover grime with it.
Drain the old oil completely, replace the filter, and refill with the oil type and amount listed in your owner’s manual.
5. Fog the engine
Fogging oil coats your engine’s internal parts with a protective layer, keeping moisture and corrosion at bay over the winter. Here’s how it works:
- Remove the air filter: This gives you access to the intake.
- Spray fogging oil into the intake: Do this with the engine idling.
- Let it stall: The engine will sputter and smoke before stalling out. That’s normal and means the oil is coating the internal parts.
- Remove the spark plugs: Spray a small amount of fogging oil directly into each cylinder.
- Turn the engine over: Crank it for a few seconds without starting it, so the oil spreads evenly across the cylinder walls.
- Reinstall the spark plugs and air filter: Wipe away any excess oil first.
6. Lubricate moving parts
Cables and seals dry out and stiffen up without some protection. A light coat of lubricant keeps them working and stops moisture from settling in.
Your manufacturer may have more specific instructions, but you’ll probably need to spray the cables and seals with a marine-grade silicone lubricant.
Also focus on pivot points, like the steering nozzle and the brake and reverse mechanisms. Lightly coat the electrical components, too.
7. Remove and store the battery
A battery left connected all winter will likely drain, and a fully discharged battery can freeze and crack in cold temperatures. Follow these steps to store your battery:
- Disconnect the negative terminal first: This is the black cable. Removing it first prevents accidental short circuits.
- Disconnect the positive terminal next: This is the red cable.
- Lift the battery out carefully: Avoid tilting it, since some batteries can leak residual acid.
- Store it somewhere stable and dry: Pick a spot that stays above freezing, and keep the battery off the ground, away from anything flammable.
- Hook it up to a trickle charger: This maintains the charge all winter without overdoing it. If you don’t have a trickle charger, check the battery’s charge every couple of weeks instead, so it doesn’t sit fully drained for months.
8. Clean, wax, and cover
A clean, sealed jet ski holds up better against moisture, pests, and any weather damage over a long winter. Before it goes in:
- Wash and wax the hull: Use a mild soap, dry it completely, then apply wax to protect the surface from moisture and UV damage.
- Empty and air out the compartments: Wipe them down and leave them slightly open so air can circulate and mildew doesn’t build up.
- Cover the exhaust, intake, and body: Stuff rags or steel wool into the exhaust and intake to block pests, then use a fitted cover over the whole jet ski. Avoid using tarps, since they can trap in moisture.
9. Choose a storage spot and position it right
Where you store your jet ski matters almost as much as how you prep it. Here’s a rundown of common options:
| Storage type | What it offers | Best for |
| Driveway or backyard | Easy access, free or low cost | Riders storing for short periods in mild climates |
| Garage or shed | Security and protection from rain, snow, and sun | Riders with space at home or renters on Neighbor |
| Indoor storage unit | Protection from weather, plus climate control if you need it | Riders without garage access or who have more to store |
| Dry or floating dock | Storage on a stand or rack | Riders who want marina access |
If you’re storing on a trailer inside a garage or storage unit, a couple of extra steps help protect your ride:
- Tilt the nose down slightly: Unlike the nose-up tilt you used for drainage in Step 1, a downward tilt sends any leftover water toward the bilge, where it causes the least damage.
- Lubricate the trailer bearings: This keeps them from seizing up over a long storage period.
When spring arrives, you’ll reverse most of these steps to get your jet ski back on the water. Here’s how to de-winterize a jet ski when the season changes.
A Cheaper Spot to Wait Out Winter
Winterizing was the hard part. Now your jet ski just needs somewhere safe to sit until spring.
Neighbor lets you compare traditional storage units from nationwide brands with spaces a little closer to home, like a neighbor’s garage or shed, often for up to 50% less. That difference matters if winterizing already has you spending on oil and a trickle charger.
Every booking can include up to $25,000 in renter property protection, and it’s just one reason renters trust Neighbor. More than 690,000 reviews add up to a 4.9-star average rating.
Browse photos and reviews for every listing, or call us to talk through your options.
Frequently Asked Questions
Do you need to winterize a jet ski in a warm climate?
Yes, you need to winterize a jet ski, even in a warm climate, if it sits unused for a few months or longer. This is because sitting in storage causes the fuel to break down and the battery to drain, regardless of the temperature.
What happens if you don’t winterize a jet ski?
If you don’t winterize your jet ski before you store it, leftover water can freeze, expand, and crack the engine, exhaust, and cooling system. Old fuel left untreated can also break down and clog the fuel injectors or carburetor. These problems often mean costly repairs once you try to start it again in spring.
How much does it cost to winterize a jet ski?
Winterizing a jet ski yourself can cost around $25–$95, depending on whether you need to change the oil. A professional shop might charge anywhere from $150–$300 or more for the same service range.
Do you need antifreeze to winterize a jet ski?
Jet skis with an open-loop cooling system usually don’t need antifreeze, since they run on lake or ocean water instead of coolant. Closed-loop systems typically need marine or RV antifreeze.
Is winterizing a 2-stroke jet ski different from a 4-stroke?
Yes, winterizing a 2-stroke jet ski skips the oil change, since a 2-stroke engine’s oil mixes directly into the fuel rather than sitting in its own tank. Both engine types still need fogging oil, fuel stabilizer, and battery removal.
Does winterizing replace a jet ski’s annual service?
No, winterizing a jet ski doesn’t replace its annual service. Annual service covers tasks winterizing doesn’t, like replacing propeller shaft grease or checking the impeller. Plan for both if you want your jet ski running well, season after season.