Wondering how you can protect your boat during the winter? Winterization is key. The cold weather can take a toll on your beloved vessel. Therefore, you need to protect it from potential damage through a comprehensive winterization process.
Winterization ensures your boat remains damage-free throughout the cold months of the season. With this approach, you can avoid spending thousands of dollars on fuel system repairs and save hundreds of hours stuck in a repair shop.
So, how to winterize a boat? This guide will give you the answer! In this boat owner’s manual, we will figure out how to winterize a boat in 5 easy steps.
Step 1: The Hull
First things first, ensure that the hull is free from any stress cracks that could worsen due to ice. You can:
- Identify and address any gel coat blisters by draining, drying, and patching them.
- Give the exterior a thorough pressure wash to remove dirt and sea grime. Prepare a mixture of a safe hull-cleaning solution and water in a bucket, then gently scrub the hull using a soft sponge. Once you’re satisfied, rinse the hull with fresh water. It’s important to carry out this cleaning in a designated area to prevent any water contamination of larger water bodies.
Step 2: The Interior
- Remove any kind of electronics and electrical systems so they don’t corrode in humid winter weather. Store them inside in a dry place.
- Treat vinyl interiors with protectant gels to prevent drying out and cracking. Check the upholstery and interior for rips and tears that should be treated.
- Clean and dry built-in head drain sinks and showers. Put antifreeze down the drains.
Step 3: The Motor
- Add fuel stabilizer to the gasoline and run for 10-20 minutes to distribute.
- Fog the carburetor and engine to prevent corrosion.
- Change the oil and drain the engine.
- Flush cooling systems and add antifreeze.
- Spray the engine with anti-corrosion spray. You can also spray electrical connections with water repellent.
Stabilize your Fuel Tank
Fill your fuel tank to about 90% to avoid condensation within the tank (condensation inboard boats can lead to freezing and expansion that can crack your tank).
Treat your boat with a fuel stabilizer when winterizing your boat. Pennzoil Fuel Stabilizer, PRI-G, and Stabil are great products that have been known to protect your boat through even the harshest of winters. However, you must read the instructions before use to avoid causing any damage to your vessel.
After adding the liquid to the fuel lines, run the engine for 10-15 minutes or until you are sure the stabilized fuel circulates throughout the engine.
If you don’t stabilize the fuel, carburetors and fuel injectors can be clogged with varnish deposits.
Cost to stabilize your fuel: $5 to $15.
Cost if you don’t: $300 to $1,500.
Fog the engine cylinders
Let’s walk through the process of fogging your boat’s engine for winter storage, ensuring its protection against corrosion. Here’s a step-by-step guide:
- Locate the Carburetors: Begin by identifying the carburetors within the engine.
- Spray Fogging Oil: With the engine running, spray fogging oil into the carburetors. Don’t be alarmed if you notice smoke; this is normal.
- Observe the Smoke: Continue spraying the fogging oil until the engine stalls. This indicates that you’ve applied enough oil. Additionally, you can also spray fogging oil into the cylinders.
- Seek Professional Advice: If you’re uncertain about the process, it’s a good idea to get in touch with your local marina mechanic for guidance.
- Use Manufacturer-Recommended Products: Different engine manufacturers offer specific aerosol products designed for their engines. It’s crucial to locate and use the recommended aerosol for your particular engine.
- Protective Oil Coating: The fogging oil creates a thin layer of wax-based oil on the internal components of the engine. This protective layer helps prevent the onset of corrosion.
- Prevent Corrosion: Neglecting to fog the engine cylinders can lead to the formation of corrosion inside the engine. This corrosion can cover essential components like cylinders, pistons, and rings with an abrasive layer of debris.
Cost if you do: $5 – $25.
Cost if you don’t: $1,500 – $20,000 (or more).
Drain the Engine
Ensuring proper drainage of your boat’s engine is a pivotal aspect of winterization. Follow these steps for effective draining:
- Locating and Opening Petcocks: Begin by identifying and opening the petcocks positioned underneath the manifolds and on the sides of the engine block.
- Removing Water Pump Hose: Next, disconnect the water pump hose. Allow the pump to drain thoroughly and achieve complete dryness.
Failing to perform this drainage procedure could result in any residual water freezing, expanding, and potentially causing damage by cracking the engine block and manifolds. It’s important to note that outboard engines are designed to self-drain and do not necessitate this particular step.
Cost if you do: $0.
Cost if you don’t: $5,000 – $25,000.
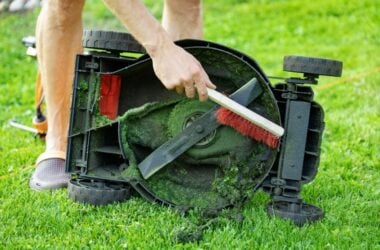
Change the Oil Filter
Performing an oil filter change is an essential maintenance step. Follow these instructions for a smooth process:
- Position an Oil Collector: Place an oil collector beneath the motor to catch the draining oil.
- Handle the Drain Plug Screw: Carefully unscrew the oil drain plug screw located at the base of the gear case. Be cautious not to let the bolt fall into the oil pan and become coated in oil.
- Open the Upper Vent Plug Screw: Unscrew the upper vent plug screw. This action facilitates the swift drainage of oil from the drain hole. Allow approximately an hour for the oil to fully drain.
- Inspect Oil Color: If you notice that the oil appears milky white or grey, it’s advised to consult your mechanic as these signs indicate underlying issues with your motor.
- Maintenance During Drainage: While the oil is draining, take the opportunity to clean the drain plug and vent screw. Additionally, replace the sealing O-rings on these screws with new ones.
- Use an Oil Pump Adapter: Attach an oil pump adapter to the lower drain hole and connect the opposite end of the pump to your oil reservoir.
- Pump Oil into the Motor: Utilize the oil pump to fill the motor’s lower unit until the oil starts flowing out of the vent hole. Proceed by screwing in the vent plug.
- Finalize Screw Tightening: Remove the oil pump adapter and promptly replace it with the drain plug, ensuring quick and secure screws. Tidy up any spills and wipe down the area.
Changing the engine oil accomplishes multiple benefits, including moisture removal, corrosion prevention, and maintaining oil freshness.
Neglecting this task could lead to harmful consequences. The presence of moisture can trigger extensive damage, resulting in reduced engine power, decreased fuel economy, and even potential engine failure.
Cost if you do: $25 – $100
Cost if you don’t: $500 (excess fuel) – $20,000 (possible engine failure).
Flush the Engine Oil Filter
Performing an engine oil filter flush is a vital step in the maintenance process. Here’s how to do it effectively:
- Gather Your Supplies: To begin, gather an engine flushing kit along with 2 to 5 gallons of antifreeze.
- Shield the Raw Water Intake: Use “ear muffs” to cover the raw water intake. Proceed to pump the antifreeze through the fuel filter while the engine is running with the ear muffs in place.
- Thorough Antifreeze Circulation: It’s crucial to ensure a comprehensive circulation of antifreeze throughout the cooling system. This step aids in the elimination of any lingering moisture. This is of utmost importance, as any remaining water has the potential to freeze, expand, and potentially cause damage by cracking various components of your mo
Spray Anti-Corrosion Spray on the Engine
Enhance your engine’s protection against corrosion by applying an anti-corrosion spray. Remember to treat electrical connections with a water repellent to avert moisture-related issues.
By meticulously adhering to these guidelines, you fortify your boat’s engine and fuel lines, enabling them to endure the cold months with resilience. Your engine’s longevity and performance will reap the benefits of these precautions.
Step 4: The Battery
When winterizing your boat, ensure your battery is fully charged before disconnecting it. Leaving a battery connected over time can lead to depletion, necessitating a replacement or jump-start, which diminishes battery longevity. An option is a trickle-charging device that gradually recharges the battery over an extended period.
If you’re seeking a budget-friendly solution, unplugging the battery and storing it in a suitable space is a straightforward approach.
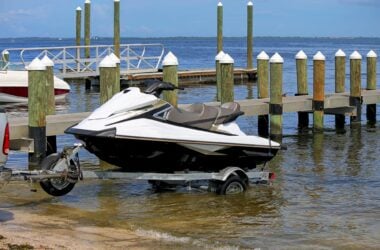
Step 5: Cover and Leverage Winter Storage
For outdoor boat storage, it’s crucial to select a suitable boat cover that effectively shields the waterline. This cover should effectively repel water and snow while allowing proper airflow to minimize the growth of mildew.
Consider these practical choices: poly tarp covers with frames, polyvinyl covers for excellent water repellency, or the option of shrink wrap.
However, if you want to protect your boat proficiently during the winter months, indoor boat/ jet-ski storage is the best option. These storage spaces do not require a special cover. Instead, your vessel can stay parked and protected all season long.
Boat owners can look for indoor boat storage spaces on platforms like Neighbor. You can search for indoor or outdoor storage spaces listed and select the best option that falls within your budget.
Source: Unsplash
Wrapping Up
By following these five comprehensive steps for winterizing your boat, the boat owner can ensure your cherished vessel’s proper care and preservation. Taking the time to winterize and store your inboard boat motor correctly is a valuable investment in maintaining your vessel’s ability to create cherished memories.
Once winterized, you’ll want to safeguard your boat throughout the winter months with the right boat storage solution. Consider exploring the storage possibilities available through boat storage platforms like Neighbor.
Disclaimer: The information provided in this article is intended for general guidance and informational purposes only. Safety practices and regulations may vary based on your location, the type of watercraft, and local laws. Always prioritize your safety and the safety of those around you when handling fuel and operating watercraft. This article does not replace professional training, consultation with marine experts, or adherence to local and national safety regulations. The author and the website are not liable for any actions taken or consequences resulting from the use of the information presented in this article. Your safety is your responsibility, and we encourage you to take it seriously.