Radon is a naturally-occurring, radioactive gas that can cause a host of medical problems, from shortness of breath to lung cancer. It is colorless, odorless, and inert, which means you may not have any means of detecting it until it has already caused significant health problems for your family members. Fortunately, there are several radon mitigation steps you can take to protect your home and prevent it from causing more serious problems.
Read on to learn more about:
- The Potential Health Effects of Radon
- How to Know If You Have High Levels of Radon in Your Home
- How Radon Is Measured
- Steps to Take to Mitigate Radon in Your Home
- How to Hire a Contractor to Deal With High Levels of Radon in Your Home
- What to Look for in Your Radon Mitigation System
- How to Maintain Your Radon Mitigation System
The Potential Health Effects of Radon
Radon exists everywhere. Generally, minor exposure will cause relatively few health problems. High-level exposure, on the other hand, may leave you with substantial symptoms of radon poisoning, including a new cough, shortness of breath, or tightness in your chest. Long-term exposure to radon over time can also substantially increase your risk of developing lung cancer.
No test exists that can test individuals for radon exposure. So you may need to monitor your health carefully if you know you have been exposed to radon. If you notice any symptoms of lung cancer, including wheezing, hoarseness, or coughing up blood, you should see your doctor immediately.
According to the Surgeon General, radon is the second-highest cause of lung cancer in the United States. People who smoke and have suffered high levels of radon exposure may have a very high risk of developing lung cancer in the future.
How to Know If You Have High Levels of Radon in Your Home
Because radon exposure often will not leave you with obvious symptoms, you may need to rely on a test to determine whether you have high levels of radon in the house. Luckily, testing for radon isn’t excessively expensive. So if you have any reason to suspect that you may have high levels of radon in your home, you can easily determine whether you need to take steps to mitigate radon in your home.
Need to know more about important steps you need to take as a first-time homeowner? Check out our First-Time Homeowner’s Guide on Everything You Should Know.
Hire a professional tester
The EPA will help you learn about local radon zones and testers who will take care of radon testing in your home. You can also contact the National Radon Proficiency Program or the National Radon Safety Board to learn more about radon testing in your area.
Use an in-home test kit
You can buy an in-home radon testing kit from your local hardware store or check common online retailers for an effective testing kit. Radon test kits run from $15-$50, on average. Follow the instructions on the package to set up your test and send it in to get your results.
Once you have seen the levels of radon in your home, you can determine whether you need to take steps to mitigate your family’s exposure and reduce the level of radon in your home.
How Radon Is Measured
Radon is measured in pCi/L. Indoor radon levels should be, if possible, no higher than 4 pCi/L. However, if your radon levels are between 2 pCi/L and 4 pCi/L, you may want to consider taking steps to mitigate the radon in your home. Radon testing generally needs to take place over 48 hours and may take as long as 90 days in order to give you an accurate reading of how much radon is in your home.
Pro tip:
Short-term tests, which take only a couple of days, will give you fast results but may not be as accurate as longer-term tests. If you want a fully accurate reading, especially if you’re planning to sell your home in the near future, you may want to use the 90-day test.
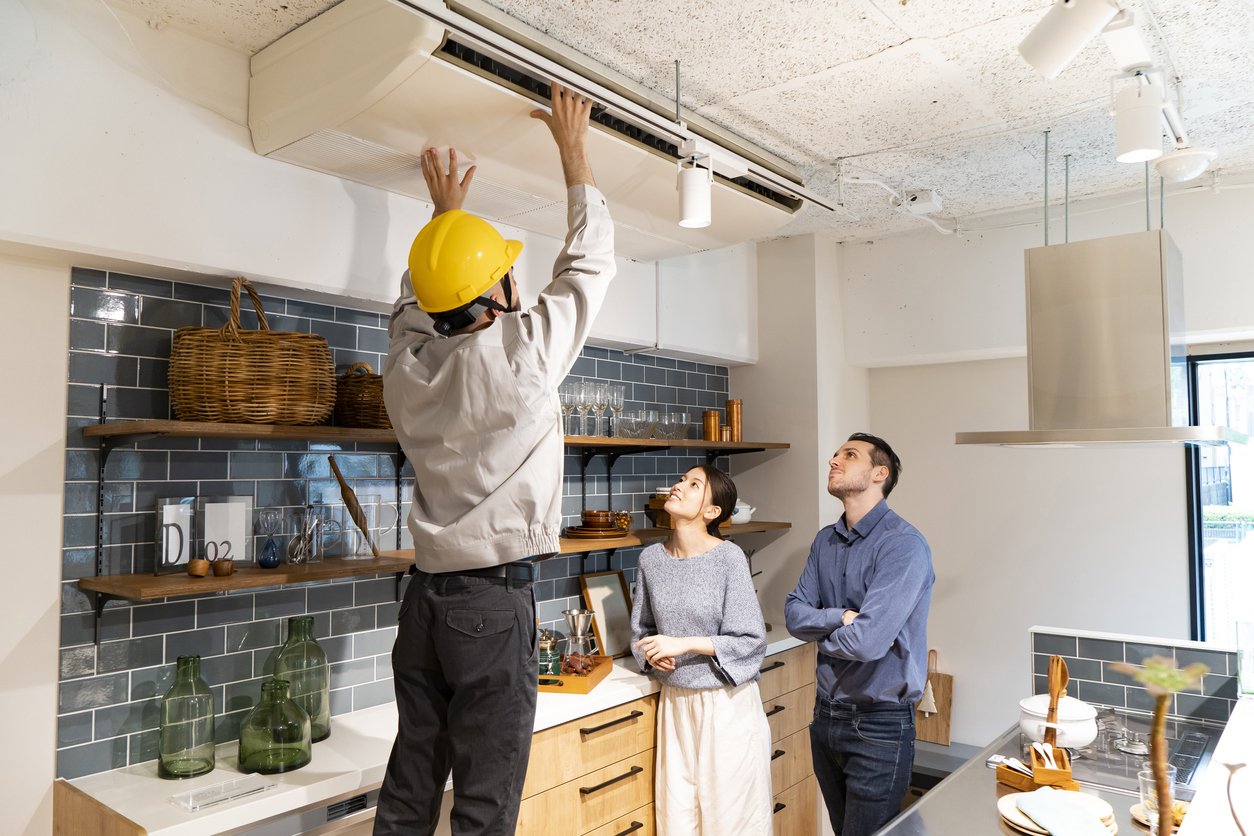
Steps to Take to Mitigate Radon in Your Home
Fortunately, most of the time, you can easily fix your home and reduce your levels of radon exposure. In many cases, a qualified contractor can handle the strategies needed to remove radon from the home and mitigate exposure in as little as a day. If you’re renting, you don’t have to break your lease. Your landlord will need to arrange for radon mitigation efforts in your rental property.
In general, the EPA recommends hiring an experienced contractor who has worked in radon mitigation in the past to handle your radon mitigation project. Lowering radon levels in the home requires specialized skills and training, which a private homeowner may not have.
Types of mitigation systems
The contractor will generally install one of several types of radon mitigation systems in your home. Alternatively, they may utilize multiple methods to seal and protect your home.
- A sub-slab suction system will pull radon directly beneath the home’s foundation and vent it outside, preventing it from lingering in your home.
- A drain tile suction system will use a pipe that penetrates into the drain tile and vent the gases from the soil safely outside.
- A sub-membrane system gets installed in crawl spaces. This system uses a plastic sheet to cover the exposed dirt, then places a pipe through the plastic sheet and runs it up into the wall. The pipe then pulls out the radon gas coming from the soil outside, instead of letting it into the crawl space.
- Pressurization, which can be done by the whole house or in a single room as needed, uses a fan to blow air into a specific area of the home, usually into the basement or a specific living area. This system attempts to create enough pressure in those areas that radon gas cannot rise into the area.
- A heat recovery ventilator, or HRV, can increase ventilation throughout the home. This can lead to a significant decrease in radon levels. While this system is highly effective, increased ventilation can also cause an increase in your heating and cooling bills.
The specific system you need for your radon mitigation project will depend on your home, where radon is collecting, and what space you have available. A professional contractor will be able to give you a better idea of which system will be most effective for your needs.
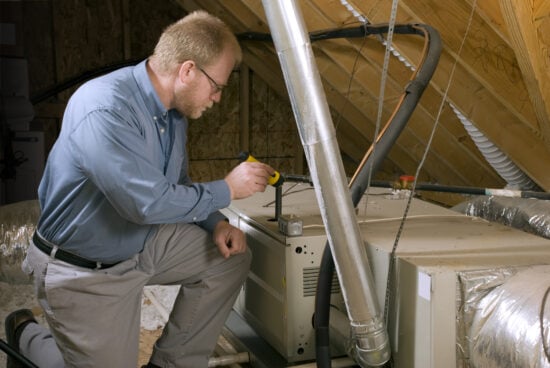
The pieces of your radon mitigation system
Your radon mitigation system may have several working parts. An understanding of them can help prepare you to maintain and make the most of your system.
The suction pit
If your system starts below the basement floor, you will need a suction pit below the floor. There, a radon pipe will begin to pull radon from beneath the home’s foundation. This pipe will typically run up out of the basement and through the roof of the home, allowing it to safely and effectively vent that radon gas outside.
The radon fan
The radon fan is usually located either in the attic or outside the home. It needs to be above the livable space in the home. It also cannot be kept in an air-conditioned room or a room where your family lives and works. The radon fan helps prevent radon from leaking back into the home.
The active notification monitor
This monitor tracks the function of the radon fan and ensures that it is working properly.
The U-tube manometer
This system provides a visual notification that will notify you quickly if the fan stops working properly. Then you can take steps to get it working again.
Will sealing cracks in the basement or crawl space help mitigate radon?
Sealing cracks in your basement or walls is an important part of your radon mitigation system. On its own, however, it will not provide the assistance you need to reduce radon gas buildup. You should contact a professional to learn more about the steps you need to take to mitigate radon in your home.
How to Hire a Contractor to Deal With High Levels of Radon in Your Home
According to EPA recommendations, it’s critical to hire a professional contractor to help deal with high levels of radon in your home. For some homeowners, finding a contractor for the first time can be a challenge. However, following the right steps can prepare you to find a contractor who can install an effective radon mitigation system. This will help protect you and your family.
1. Check for a contractor who has the right qualifications.
Even if you have a contractor that you have worked with in the past — and really enjoyed working with — you may not want to use that contractor again for your radon mitigation efforts. You need a certified radon mitigation contractor who has the training necessary to fix radon problems. You can check with your state radon office to get a list of licensed professionals who can install and maintain your radon mitigation system.
If your state does not require radon mitigation certification, which could make it harder to find a contractor with the certifications you need, look for these standards and certifications:
- The ASTM, or American Society for Testing and Materials
- Standard Practice for Installing Radon Mitigation Systems in Existing Low-Rise Residential Buildings, E2121
- Private proficiency programs in your area
In addition, make sure you’re working with a contractor who carries insurance that will protect them and you if something goes wrong while they’re working on your building. Also, verify that the contractor’s professional credentials, including the contractor’s license, are up to date. Every time you need to hire someone to work on your home, you want to make sure that person is insured and certified. That helps ensure you get the high quality of work you’re paying for.
2. Ask for estimates.
When choosing a contractor for a major construction project, especially one as important as your radon mitigation efforts, you need to get more than one estimate. Costs for the service can vary dramatically between different contractors, and you do not want to end up paying more than anticipated for your radon mitigation system.
That does not necessarily mean, however, that you should go with the cheapest estimate. In order to deliver an estimate, a contractor will need to walk through your home and take a look at the project that needs to be completed — in this case, your radon mitigation system — and determine what you will need to do to manage that system effectively. You should consider:
- Does the contractor you’re considering have a different idea of how the system will work?
- Is one contractor dramatically different from the others you have had come out to take a look at your home in terms of price?
- What is the reason for the difference in the estimates?
- What does the estimate include? For example, does the estimate include everything you will need for your radon mitigation system, including all materials? Or does one estimate have some missing elements? Keep in mind that some of the costs will include maintaining the home’s aesthetic appeal. That is, you do not want an ugly system that seems to be taking over the area. If the estimate does not include covering or concealing the system, you may end up paying more to fix those problems later.
How much should it cost to install a radon mitigation system in my home?
Radon mitigation should not be any more expensive than many of the other home improvement projects you need to handle on a regular basis. On average, across the nation, radon mitigation systems cost between $800 and $1500. However, the complexity of the system, the size of your home, and current market challenges can all have an impact on how much you will ultimately pay for your radon mitigation system.
You may also need to consider the average cost of maintenance and upkeep when you purchase your system. Fan warranties, for example, usually run about five years. After this, you will need to have the cost of a replacement fan and any maintenance on hand.
3. Check references.
Before settling on a specific contractor, make sure that you check his references. Most established contractors, especially those who have taken the time to update their certifications and register as radon mitigation specialists, have a history of satisfied customers who may be willing to speak on their behalf. These contacts will let you know what you can expect when you work with them.
Ask to speak with those references. They will provide you with the best idea of what it’s really like to work with a specific contractor. You may want to ask questions like:
- What was it like to work with the contractor?
- Was the contractor respectful of your space? Did he clean up after himself?
- Did the contractor successfully install your radon mitigation system?
- How long did it take to get your system installed and everything up and running?
You may also want to ask what, if anything, the reference would change about the experience. You could even ask whether they would work with the contractor again.
4. Read reviews whenever possible.
Talking with references is a great way to get an idea of what it’s like to really work with a specific radon mitigation contractor and have your questions answered. However, most contractors will put you in touch with their best references. These are the people who are most likely to give them a great review for the work they have done. In order to get a full picture of the contractor’s history, take a look at reviews online. You can find reviews on:
- The contractor’s website, which will usually contain primarily or entirely positive reviews
- The construction company’s Google My Business page
- The contractor’s social media page
Take a look at star ratings to see what average rating the business gets. Then, take a look at some of the comments. Make sure you read both some of the best and some of the worst reviews. At his worst, what is this contractor like to work with? What errors has he made? Look for and disregard outliers: for example, one bad review amidst a crowd of more positive ones. Often, those negative reviews come from a disgruntled individual who has their own concerns to deal with or from someone who might never have worked with the contractor.
On the other hand, if the contractor has consistently bad reviews, especially those that repeatedly mention the same issues, you may want to consider what led to those reviews and how the issues brought up could influence your relationship with the contractor.
5. Take a look at the contractor’s test results.
In order to determine whether radon testing has been effective, you will need to do a before and after test. If the system is effective, radon levels should go down quickly. On the other hand, if the system is faulty, it may not bring radon levels down as much as anticipated. The contractor might not be the best choice for your project. Take a look at the contractor’s past projects and the test results offered by those projects.
6. Consider what you really want in your radon mitigation system.
Different people have different needs based on their budget and personal preferences. As you’re considering the contractor that you want to work with on your radon mitigation project, make sure you choose the one that’s right for your needs.
Are you more concerned about aesthetic appeal or about the function? If you’re on a tight budget, you might settle for a less-attractive system that is more visible in and around your home. On the other hand, if you’ve got a little more extra money to work with, you may decide that you’re willing to pay more to get a more visually attractive system.
What to Look for in Your Radon Mitigation System
Once your contractor has installed your radon mitigation system, how do you know it’s working properly? There are several key details you should look for in your system as you determine whether it is helping you meet your goals and keeping your home as safe as possible for your family. Check for:
- An alarm or notification system that will let you know if radon levels start going up again. Ideally, you want to know as soon as possible if you need to take further steps to mitigate radon.
- Clear labeling that will show exactly what the radon mitigation system is and its purpose. With clear labeling, you decrease the odds that a future construction project will inadvertently interfere with the functioning of the system.
- Testing once you have installed the system. Without clear testing to show that radon levels have been reduced, you cannot know whether your system is working effectively. This test should take place no more than 30 days after the system has been installed but no less than 24 hours after installation so that your system will have time to work.
- All components of the system, from exterior fans to wiring, must be installed according to local codes.
- The exhaust fan, if used, is installed above the living space in the home. It should never be installed at or below livable levels in the home.
- A solid understanding of your radon mitigation system and how it works. Before the contractor leaves, he should explain the system to you and make sure that you understand it completely.
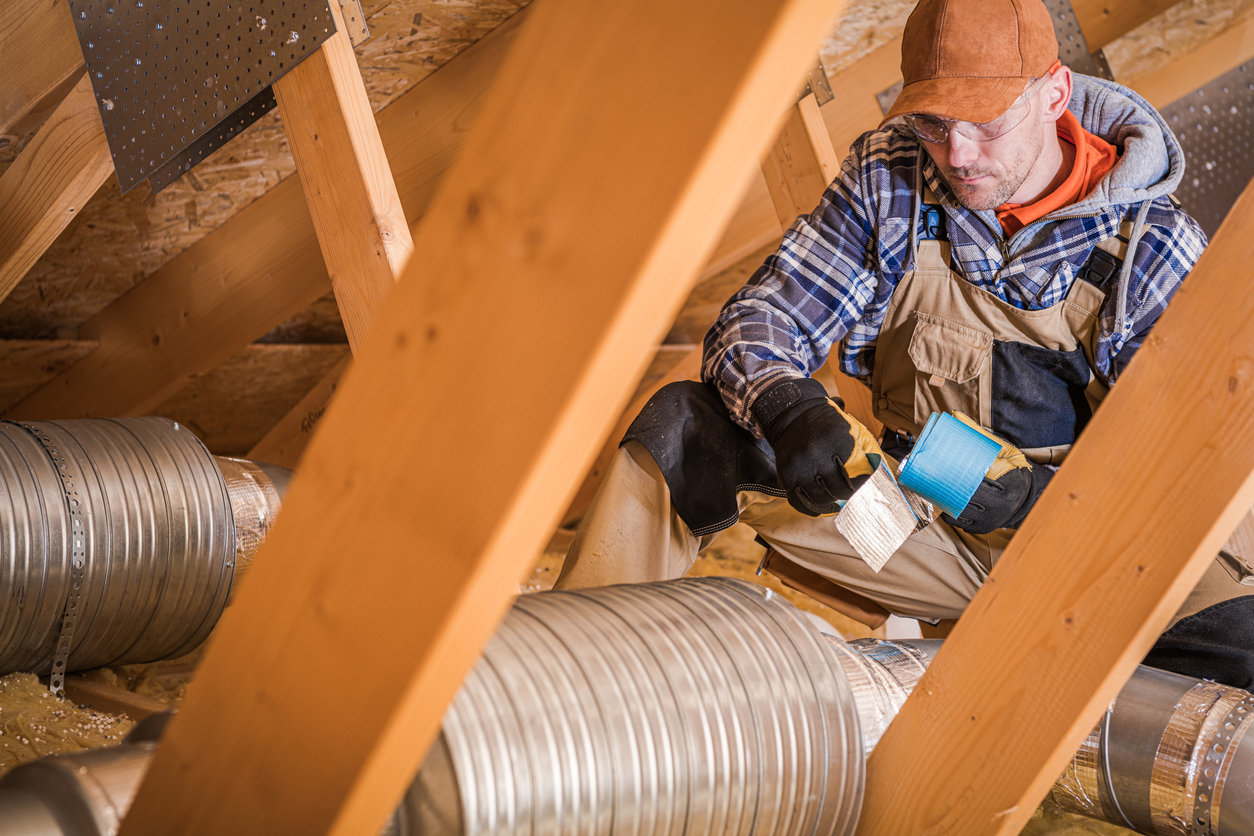
How to Maintain Your Radon Mitigation System
Your radon mitigation system, once installed, requires occasional — but not substantial — maintenance. You should:
- Replace the filter in your HRV; it should generally be replaced twice a year. Make it part of your regular spring maintenance so it’s easy to remember!
- Check your warning system or notification system on a regular basis to make sure that it is working properly.
- Replace or repair your fan when needed. Note that the fan should never stop running.
- Have your ventilator checked annually by an HVAC professional. Like the exhaust fan, HRVs used for radon control should run all the time.
- Pay particular attention to your system in winter, especially if you live in an area with heavy snow and ice.
High levels of radon in your home can leave you feeling worried and out of sorts. Fortunately, installing a radon mitigation system is often easier and less expensive than you think. Also, it will keep your home safe for habitation and more comfortable for you and your family for a long time to come.


