Deciding to renovate your basement is a great way to add value and usable space to your home. An unfinished basement may allow you to store unwanted items. But that space isn’t as functional as a finished basement. This guide on how to renovate your basement will help you through each step of renovating a basement, from how to make the space ready for construction to adding in the finishing details.
- Step 1: Decide How You Want to Use the Space
- Step 2: Set a Budget
- Step 3: Clean Out Your Space
- Step 4: Conduct a Moisture Test
- Step 5: Research Local Codes and Requirements
- Step 6: Insulate Your Basement
- Step 7: Take Care of Electrical and Plumbing
- Step 8: Frame and Put Together Any Additional Walls
- Step 9: Paint
- Step 10: Put in the Flooring
- Step 11: Install the Ceiling
- Step 12: Add the Details
Step One: Decide How You Want to Use the Space
Before you renovate your basement, you need to know how you plan to use that space. Your dream for your basement may help determine everything from what flooring you choose to what color you paint the walls. So, spend some time in the space and decide how you want to use it.
If you’re planning a renovation to appeal to home buyers or to increase the value of your home, you may want to create a more open design. Then, future owners can use it for their own purposes. On the other hand, if you’re planning to stay in your home long-term, you may want to develop your space exactly according to your desires.
Options for Your Newly Renovated Basement
You may want to:
- Set up a home gym. A home gym in the basement may add value to your home. The equipment, however, may add thousands to your budget when you renovate your basement.
- Put in a second living room or a rec room. Adding an extra gathering space can add significant value to your home, especially if you started with an unfinished basement.
- Set up a wet bar. A wet bar may add value to your home for families at any stage of their lives.
- Put in a playroom for the kids. A playroom may, however, make it significantly more difficult to sell your home to a family without children. So, take that into consideration as you plan how to renovate your basement.
- Design a game room. A game room can add appeal to members of any family, which may be a selling point when you’re ready to leave the house.
- Add a bedroom. The basement is a great place for a spare room or for an older child to have space to get away on their own. In order to count as an official bedroom for home appraisal purposes, you will need to make sure that the bedroom has at least two exits in the event of an emergency.
- Put in a home theater. Like a living room, a home theater can help add value and living space to your home.
- Set up a dedicated space for laundry. A big laundry room may not make a big difference in the overall value of your home. But it can be appealing to buyers who are looking for more usable space.
Don’t Forget About Storage Space
As you’re considering how to set up your space, remember that you may still need to leave some room for storage. All those items that have been in your basement in the past will still need a place to go in the future. While the garage can offer some space as you renovate your basement, you don’t want to lose your parking spot.
Consider creating a closet or building a storage room into your basement plans. If you need other temporary or long-term storage solutions, check out Neighbor to learn more about the options available in your area.
Step Two: Set a Budget
Before you can set out to renovate your basement, you need to have an idea of how much your project will cost. Establishing your budget is an important step. This will help you choose the right materials and finishing features. It will also help shape each stage of the process. Make sure you have a budget in mind before you begin your project. It’s especially important to have a budget before you start purchasing those important materials.
How Much Does It Cost to Finish a Basement?
In general, you can expect an average of $25 to $50 per square foot to finish your basement. An average basement renovation costs around $30,000. But your final price tag will depend on a variety of factors, including what you want to do with the space.
How Do I Calculate My Basement Budget?
Calculating your basement renovation budget starts with assessing the funds you have available. How much do you have saved? How much do you want to borrow? You may want to consider several factors when determining how much you want to spend when you renovate your basement, including:
What renovations do you want to make?
If you’re planning to put in a full bathroom or kitchen when you renovate your basement, for example, you may need to consider the cost of plumbing. A home gym may raise the price of your renovations due to the cost of exercise equipment. Take a look at what materials you may need for your renovation before you get started.
Is a DIY basement renovation an option?
Even if you’re experienced with DIY techniques, you may still need to bring in an experienced contractor to help with your renovations. Electrical or plumbing modifications, especially, should be handled by a professional.
How fancy do you want the space to look?
Some people want a very fancy space, with just as much attention to detail as they want upstairs and throughout the rest of their home. Others are content with a simpler, functional space.
What allowances do you need to make for local codes?
You may, for example, need to add an exit from your basement to make it a usable living or bedroom space. This can add to the cost. We discuss building codes more in-depth in Step Five.
Step Three: Clean Out Your Space
In order to renovate your basement, you’re going to have to clean out all of the “stuff” currently occupying that space.
You may have used your basement for storage for years. Past occupants of your home may even have left items in the basement. Before you can turn that basement into usable space, you need to clean out what’s already in there. Make sure you have a clean slate so that you’re not working around items you no longer want as you start your renovation!
Cleaning out your space ahead of time will also make more room for the professionals as they come in to provide estimates and advice about your basement. Consider hosting a yard sale to get rid of those unwanted items.
Step Four: Conduct a Moisture Test
When you’re using your basement for storage, you might not worry about a little bit of dampness. But when you’re ready to renovate your basement, dampness and moisture could prove a much more significant problem. Trapped moisture can lead to mold and mildew growth. It could even warp the future new floor in your basement.
Before you start looking into damp basement solutions, test for moisture. You can use:
A calcium chloride test.
In a calcium chloride test, which is usually conducted in three locations for every 1000 square feet of flooring, you’ll place carefully weighed calcium hydroxide into a container, which is covered by a plastic seal. After 72 hours, you can weigh the container again. Any extra weight in the container is due to water evaporation, usually from a concrete basement floor.
A relative humidity test
This is usually conducted by professionals. They’ll drill into the concrete slab directly or use meters installed when the concrete was poured to test the humidity levels of the floor. This method can often prove more accurate and provide more information about humidity levels throughout your basement space.
You should also conduct a full inspection of your home before you renovate your basement. Then, you can make sure that there are no unwanted cracks or crevices where additional moisture can sneak in. If you notice cracks or areas of the walls that seem to have accumulated more moisture than they should, you may need to make repairs before continuing with your renovation. Check for pools or drips of water, especially after heavy rain when they may be easier to spot. If you notice cracks or find any signs of water, they need to be repaired before you start your basement renovation. Also, make sure the ground is graded away from the foundation to help reduce the risk of water getting into your basement.
What happens if the basement humidity levels are high?
Relative humidity in your basement and throughout your home should, if at all possible, remain at or below 50%. At 80% relative humidity, the risk of mold and mildew starts to climb. Fortunately, the presence of that humidity does not necessarily mean that you cannot continue with your basement renovations. It may simply mean that you need to make a few modifications to your plans. These tips can help you work around high humidity levels in your basement:
- Identify any moisture sources. Is there water coming into the basement? If you notice water during heavy rains, you may have a leak somewhere that needs to be repaired.
- Install a dehumidifier. Make sure you clean it out and replace its filters frequently to prevent mold and mildew growth.
- Avoid using carpet in the basement. While carpet can give your basement a warmer, more homey feel, it can also collect moisture. Instead, choose a hard flooring and use rugs for decoration and comfort.
- Keep air circulating through the basement throughout the year. If your basement remains at a relatively consistent temperature, you may be tempted to avoid using climate control in the basement. Keeping air circulating through the area, however, can help stave off excess moisture.
Step Five: Research Local Codes and Requirements
Before you dive in with your renovation, take a moment out to research local codes and requirements for renovations. Call your local city planning department or examine building codes by state. You may need to apply for building permits or ensure that your building is up to code before you get started on your renovation. Make sure to consider these two common requirements for basement renovations:
- How many exits your basement must have: If you intend to put a bedroom in the basement, for example, exits are critical. Some cities may require at least two exits from any space you’re in regularly.
- How high the ceilings must be: In some cases, there may be ceiling requirements that dictate how you can use your basement space. Make sure you check them out before you renovate your basement.
Familiarizing yourself with the necessary codes and procedures before you start with your basement renovation is essential. You don’t want to run into expensive fines or problems down the road when you discover that you don’t have the right permits or that you failed to ask the right questions early in the renovation process.
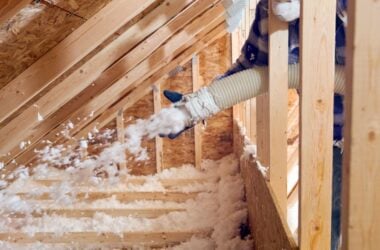
Step Six: Insulate Your Basement
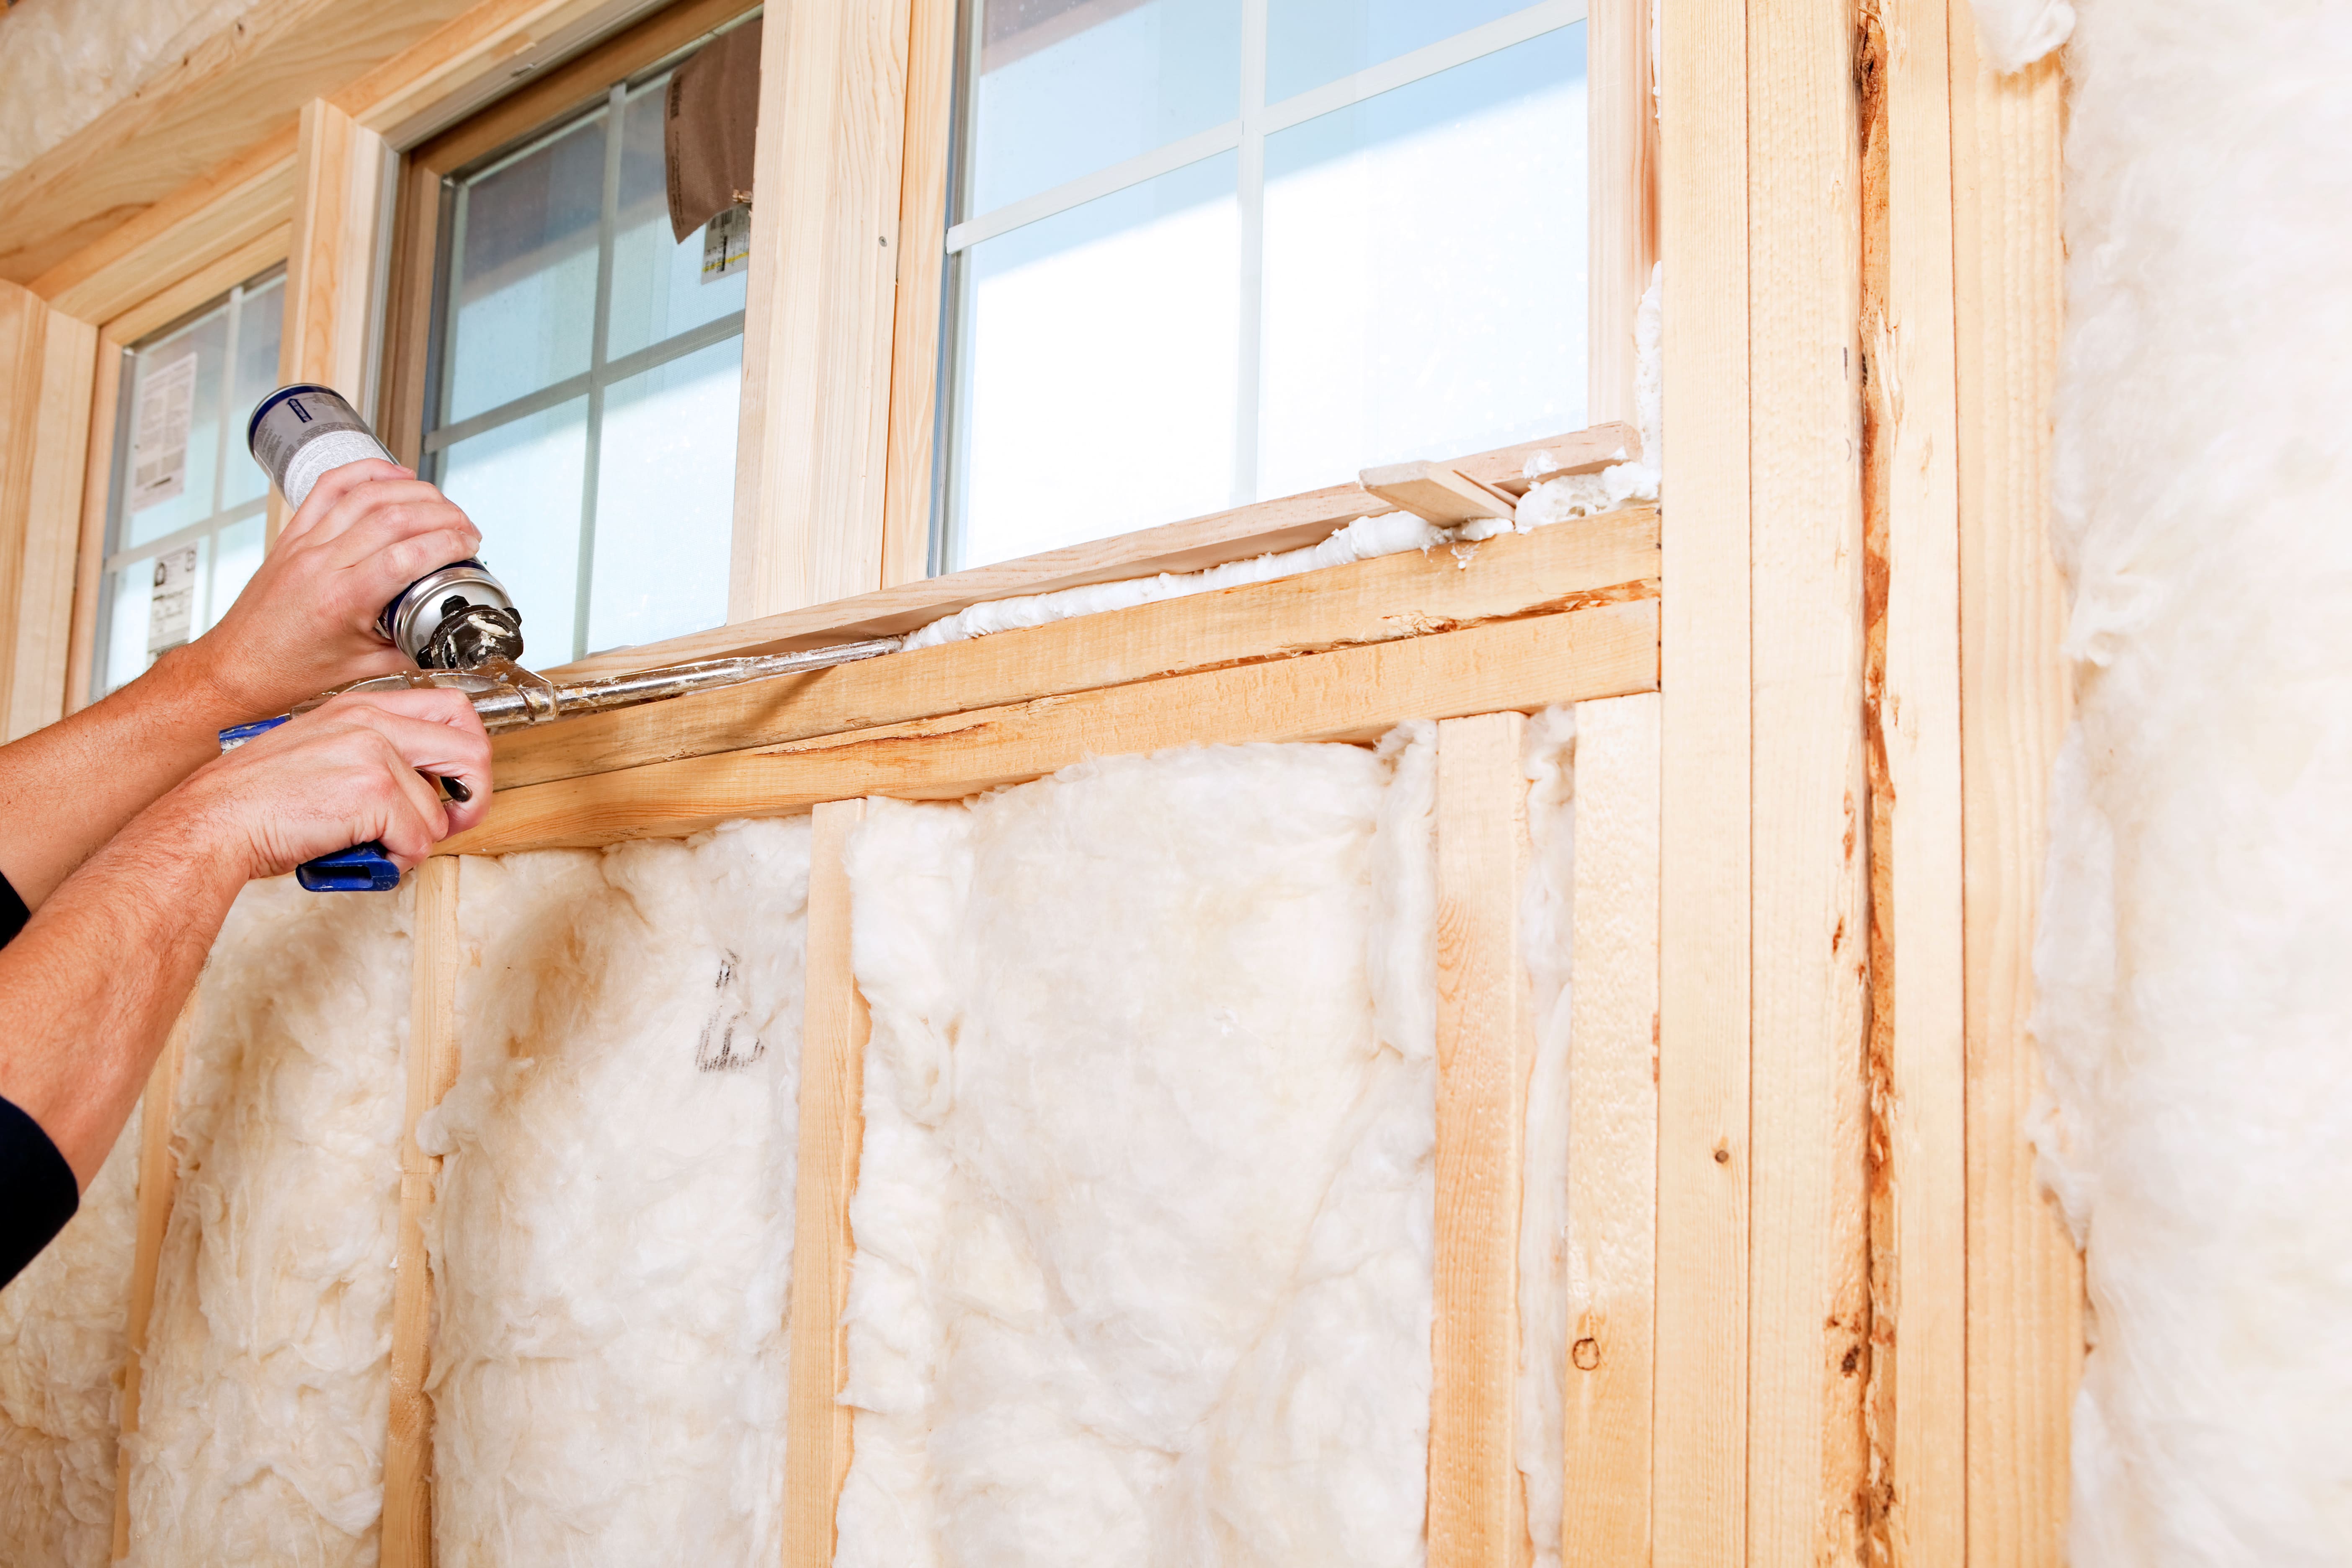
Once you’ve taken care of the pre-renovation work, it’s time for the active renovation to begin! The first step is insulating the basement walls. Oftentimes, walls in an unfinished basement are simply cinder blocks. Adding insulation can help protect your energy costs and increase the comfort level of your basement. You have several options for basement insulation, including these three popular options:
- Spray foam: This foam can fill all of the cracks and crevices to help prevent mold and mildew growth. Spray foam can be a messy proposition. It may also cost more than other insulation methods. But it also provides an extra element of protection and can help prevent moisture from making its way into your basement.
- Foam board: This material should be between two and four inches thick. The exact thickness will depend on your climate, as well as your local codes and requirements. You can fill any seams around your foam board with house wrap tape or use spray foam for the seams.
- Foam and fiberglass insulation: When you use foam board and fiberglass, you will install the foam board directly against the concrete or block walls. Then you frame the wall and add fiberglass insulation between the studs. This method can prove much more inexpensive than the other methods described above. But it shouldn’t be used if you have ever struggled with high moisture levels in the basement.
Step Seven: Take Care of Electrical Systems and Plumbing in Your Basement
Before you proceed with your basement, take the time to map out the rooms. Where do the outlets need to be located? Do you have any pipes or plumbing that needs to be added, especially if you’re adding in a bathroom or kitchen? You should generally contact a professional plumber or electrician to ensure that those details are up to code when you renovate your basement. Some cities even require specific certifications to work on electricity or plumbing directly.
Step Eight: Frame and Put Together Any Additional Walls

Are you planning to add distinct rooms to your basement? You might want to add more than one bedroom or put in dividers between specific areas of the basement. Once you’ve insulated the exterior walls, it’s time to frame those interior walls. The four basic steps are:
- Cut your 2x4s to the correct length. On vertical wall joists, subtract 1/4″ plus the thickness of the top and bottom plates.
- Install blocking between overhead joists. Attach a 2×4 every two feet.
- Put the wall together on the ground. You will need joists every 16 inches. The 16″ mark should be in the center of each joist. Make sure to account for doors and windows, which may mean shifting joists accordingly.
- Tip the wall up. Attach the bottom first, then the top.
Once your walls are framed, you can hang your drywall. This is the outer surface of the wall that everyone sees. Drywall sheets can be hung either horizontally or vertically. In most homes, however, horizontal drywall will decrease the number of seams and make it easier for you to put it together. Measure each piece of drywall to make sure that it ends on a stud. You will need to trim away excess drywall and cut out holes for your outlets, vales, windows, and doors.
How do you make the walls smooth and ready for paint? Once the drywall is up, caulk the seams and screws. Add drywall tape to seams in the wall, then caulk again. This will give you a solid, smooth surface throughout your basement.
Step Nine: Paint Your Basement
Your basement walls may require several coats of paint before they look their best. Start with a coat of primer. You may want to use a waterproof primer to help keep your walls clean and dry. Then, add two coats of paint to keep the walls looking their best. If you’re going to use the basement as a kid or family-friendly space, you may want to use washable paint. This makes it easier to remove grit and grime, as well as crayon, marker, and the other materials that kids often add to the surface of walls.
PRO TIP
Painting your basement before you put in your flooring can offer one key advantage: no matter what you spill, it’s not going to be on the finished floor of your basement!
Step Ten: Put in the Flooring
Your basement flooring can help set the tone for the entire basement. But choosing carpet when you renovate your basement can be a recipe for disaster. Any flooding or leaking may result in mold, mildew, and, ultimately, the need for carpet replacement. If you do choose to use carpet, consider carpet tiles. These are easier to pull up and dry out or replace individually if needed.
You may also want to avoid hardwoods, which often create a thriving breeding ground for mold and mildew. They can also degrade over time if there’s any moisture in your basement, let alone high levels of moisture. Instead of carpet or wood, consider better basement flooring materials like:
- Floor tiles with built-in vapor barriers
- Floating floors, including cork, laminate, and sheet vinyl
- Ceramic tile
You can also choose to simply put an epoxy seal over your concrete floor. This method may leave you with cold, hard floors in the basement. But it’s also highly resistant to water damage and doesn’t usually attract germs and bacteria. Other types of flooring will also install easily over the epoxy if you decide you want a change down the road.
Whatever type of flooring you choose, make sure it’s either waterproof or water-resistant. Inevitably, flooding or water damage will sneak into your basement. Choosing the right type of flooring can help decrease the damage — and the bills you’ll face.
How to Finish a Basement Floor
- Install subflooring, especially if your basement has high humidity levels. Lay down polystyrene insulation sheets, and then put the plywood sheets on top. This will form a solid base for any type of flooring you want to add. It will also provide a moisture barrier that can help protect your home.
- Check the instructions for your flooring. Some types of flooring, including bamboo and even laminate, may need to acclimate to the area where you plan to put them down. Open the boxes and leave them for a few days while you take on the rest of your tasks.
- Lay down the flooring. Make sure to measure carefully around outlets, vents, and doorways to ensure a smooth floor.
- Seal the floor, if needed. A seal can help protect against moisture damage or damage to the floor through regular use. This is a good way to protect stylish tile floors.
Step Eleven: Install the Ceiling
While you don’t have to have a finished ceiling in your basement, it can help the space look more complete. Check your ceiling height before installing a ceiling, since it can make your space appear even lower or smaller. Simply painting over the ceiling can make it look better without sacrificing space.
You may also choose to install drywall when you renovate your basement. This option will take a little space out of the walls, but it will make your basement look more finished than paint alone. The process to install drywall on the ceiling isn’t dramatically different than the process of the walls of your basement. An extra set of hands can help hold the drywall in place through the installation. Alternatively, you can use a drywall jack to help hold the drywall while you screw it in place.
If you choose a drop ceiling, you can cover all exposed pipes and floor joists while leaving hatches that provide access to those areas. Make sure to leave access hatches at convenient locations so that you can easily conduct any maintenance needed on your home.
Step Twelve: Add the Details
Once your basement has been framed and prepared, it’s time to clean up the space and add the details that will make the space complete. Now, you can put in that home theater equipment, bring in the gym equipment, or add the game tables that you’ve been excited about since your basement renovation began.
Hang pictures or posters on the walls for decoration, add curtains to any windows, or take care of those important last-minute touches. You’ve transformed your basement from a basic storage space into a useful, incredible addition to your home. Now, it’s time to enjoy it!