Cargo trailer camper conversions are not for the faint of heart. Depending on the type of trailer you’re converting, and how often you can work on it, these projects can take anywhere from a month to a couple of years.
It may be a lot of hard work, but if you’re the handy type, there’s no better way to create your own customized camper on a budget. A cargo trailer conversion is a particularly great option if you’ve scoured every RV show and dealership in the area and are struggling to find your dream RV (one that checks all of your boxes).
So, do you have what it takes to convert a cargo trailer into a camper?
Let’s find out!
Key Takeaways
- A cargo trailer is a more customizable, cost-effective, and lightweight alternative to traditional RVs.
- When choosing the right cargo trailer—consider size, weight capacity, and construction quality to ensure a solid foundation for the conversion.
Why Should You Convert Your Cargo Trailer into a Camper?
Do you find yourself looking at RVs (either at dealerships or RV shows) and saying things like…
- Why is that there? It should be on the other side.
- I wish they used better-quality cabinets.
- I wish they had storage for (insert your unique brand of gear here).
- I could do it better.
When Corey from the DIY Cargo Trailer YouTube channel looked at RVs on the market, he struggled to find an RV that met all of his wishlist items, so he decided to take matters into his own hands. You can check out his conversion journey here.
If you’re in a similar situation, a cargo trailer camper conversion may be in your future. It’s the ultimate way to customize an RV to your needs (in a cost-effective way). And, if you already own a cargo trailer, you probably already have a tow vehicle ready to go.
Phase 1: Plan Your Cargo Trailer Conversion Layout
Most people try to speed through the layout planning phase of their cargo trailer conversion, but I recommend taking your time when planning the best use of your space. Flesh out all the different options so that you can make an informed decision without regrets.
Here’s how…
Step #1: Over-Consume Information and Over-Research
Yes, I’m being serious. Here’s why you want to overconsume information–be it YouTube tutorials or step-by-step blog articles. This phase of the process is a time to learn from those who’ve walked this path before. Because starting out, you don’t know what you don’t know.
By delving deep into others’ experiences, you learn…
- What’s possible
- What you like – and don’t like,
- How to DIY
- And – more importantly – how not to DIY
Immerse yourself in the Camper Conversion space by watching a ton of videos on Youtube channels like…
- New Jersey Outdoor: Shows lots of different options and designs that other DIYers have used.
- Exploring Alternatives: Helps you decide what styles fit you best.
- Offroad Nomads and DIY Cargo Trailer: Show you the processes they used to convert their campers
Or, if you’re more of a reader, check out blogs like…
Lastly, attend RV shows and look at everything.
Once you’ve digested all the information you can possibly stomach, it’s time to put the pieces in motion.
Step #2: Make Your Wish List
The next step is to write down every feature you’ve seen that you really want in your camper.
- Do you like that coffee bar? Copy it.
- Is that customer slide-out gun case a perfect fit for your camper? Use it!
- Did you see an extensive spice rack on Pinterest that actually keeps all of your spices in place while you travel? Pin it so that you can replicate it later.
Then, come back to earth and look at the cargo trailer you’re working with to evaluate how much of your wish list is possible.
Step #3: Draft a Floor Plan
Even better, draft 4 or 5 plans. Put together different variations of your “must-haves” to see which you like best.
Whatever you do, please get feedback from those who may be sharing the space with you. Having an extra set of eyes will help you identify projects that seem like a good idea to you, but will actually create problems somewhere else. This step can help prevent big (and costly) mistakes.
For example, say you’re thinking about designing a kitchen with the fridge and the dishwasher in the same corner. If you go through with it, you’ll soon discover that you can’t open both appliances at the same time–which is a recipe for disaster.
Had you asked someone for a second opinion, they would have told you, “That’s a bad idea.” But you didn’t. And now you have to close the dishwasher every time someone tries to get into the fridge while you’re doing dishes.
Step #4: Get Proof of Concept
If you’re experimenting with tech, like solar panels, for example, set them up to make sure they operate at a level that supplies the energy needs of the appliances you want to have in your camper. Aside from the energy needs of your appliances, you’ll also need to account for the amount of space your solar system/batteries will take up (and incorporate these rough dimensions into your design). Once you know how many batteries you need, you can allocate the necessary amount of space for them inside your camper.
One of the great things about YouTube is that you can find examples of what works and what doesn’t work.
If you have an idea – like installing a gravity-feed shower outside your teardrop–you may not be sure of the best way to go about that. Fortunately, you can always consult YouTube, and see how others have set up their gravity feed showers. As a first step, research what outdoor shower works best for your space, and then put it together yourself.
The best way I’ve found to get proof of concept is to attend an RV show. Here, you’ll see examples of designs put into action. You can also pepper the salespeople with questions and get immediate answers.
Step #5: Set a Budget
Your budget depends on the type and size of the cargo trailer you’re converting. It also depends on how you plan to use it. Are you living in it? Are you taking it camping for a weekend? Do you prefer luxury or roughing it? Do you even need power and plumbing?
Finally, the cost of supplies also depends on where you live. It’s easy to get carried away with all the possibilities, so give yourself a budget.
Phase 2: It’s Time to Execute Your Cargo Trailer Camper Conversion
You’ve done the hard part. You’ve got everything planned out, so let’s bring it to life.
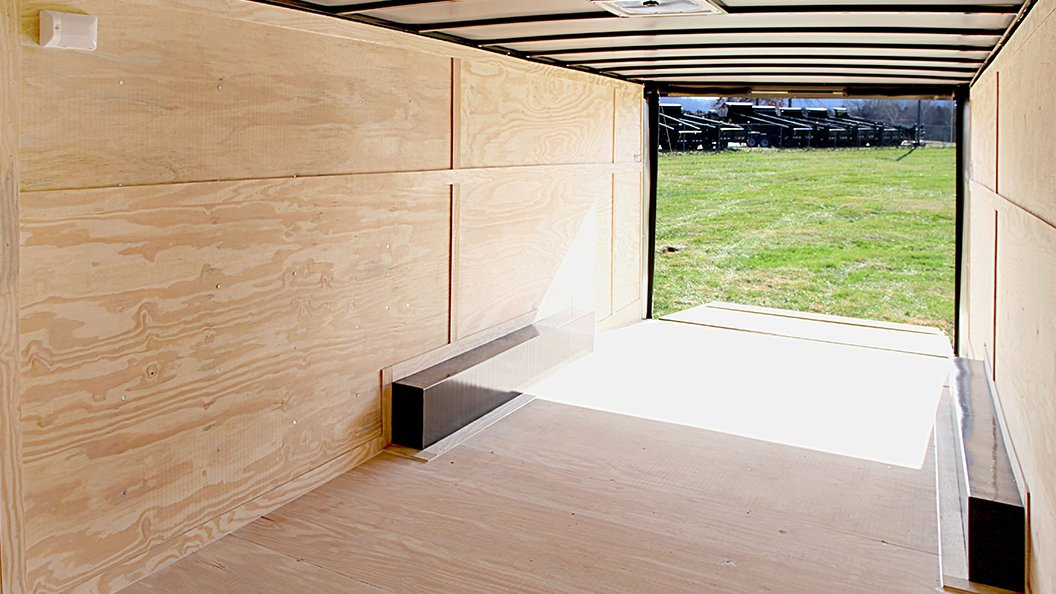
Step #1: Strip Down Your Cargo Trailer
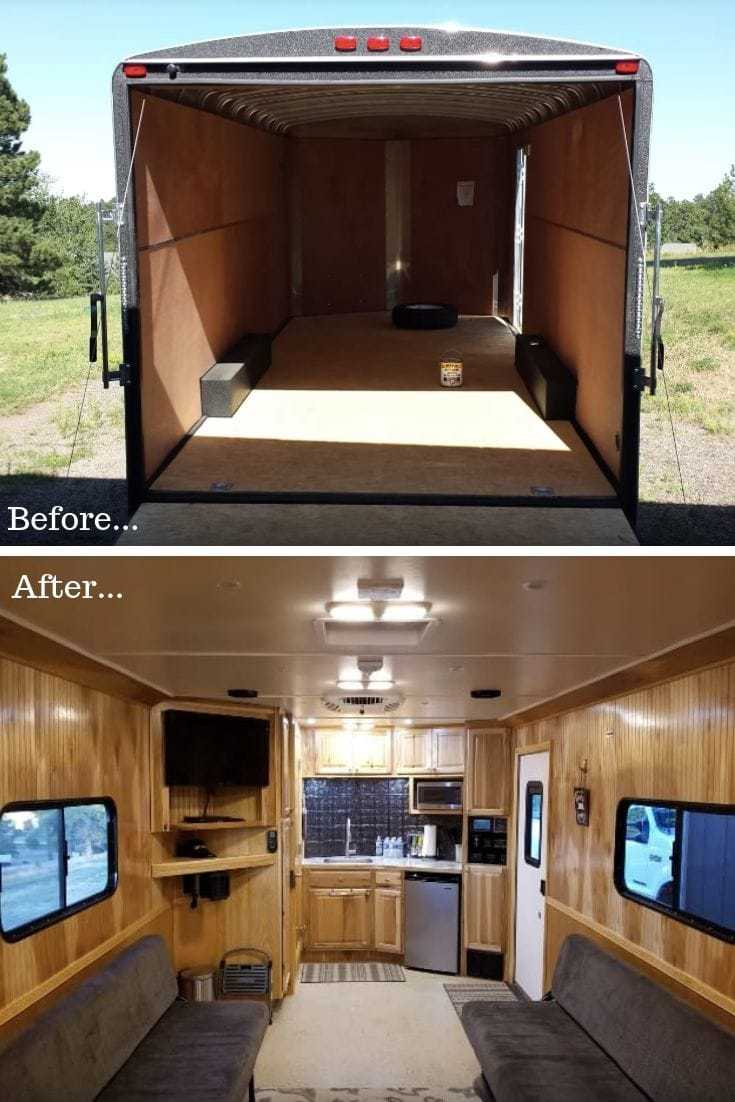
Take everything out. You should be left with bare metal walls. If you’ve used it as a cargo trailer for work in the past, then clean the interior so that there’s no residual material left from when it was a cargo trailer. The last thing you want is for your new tiny home to still smell like whatever you previously stored–like gasoline and old work rags.
Step #2: Frame and Insulate Your Camper
Use 2x4s to frame the walls you want to put up – if any. Now, insulate between the studs with your chosen insulation.
Step #3: Install Your Electrical and Solar Power
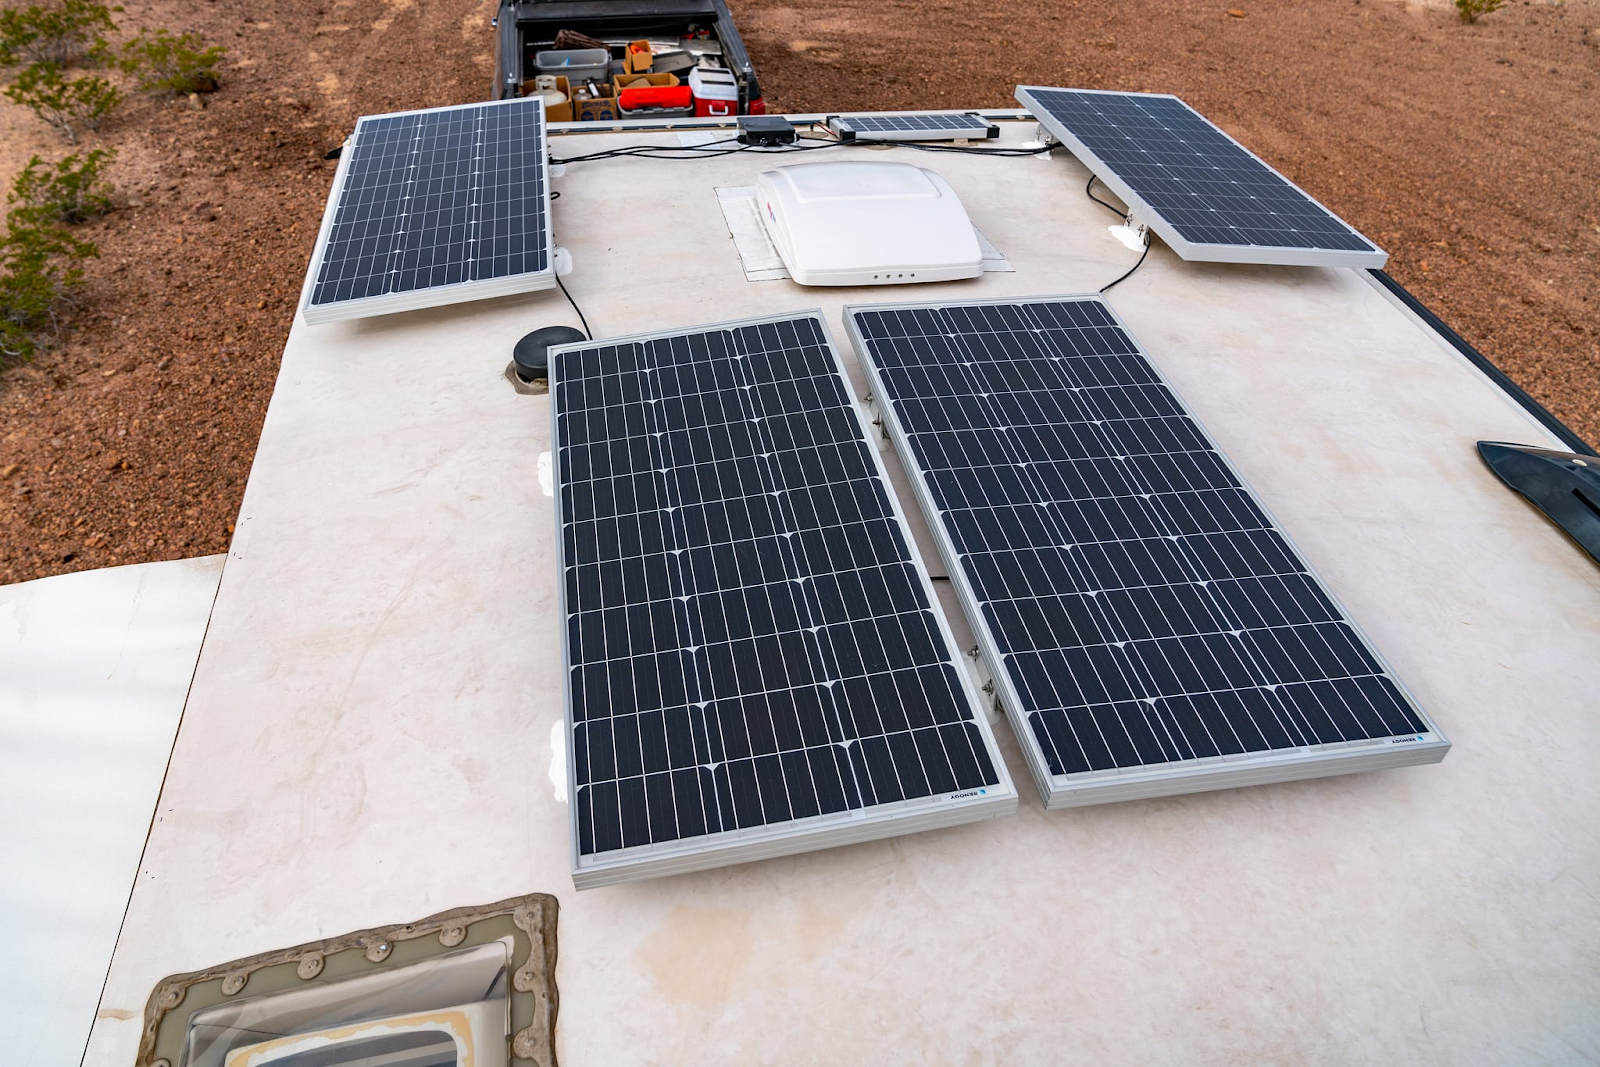
Run your electrical wiring to the places you’ve marked for outlets and lighting.
You tested them before, but if you’re using solar as a power source, then now’s the time to install the solar panels on your roof. Once you’ve installed the solar system in your camper, test the connections before closing up any walls or the ceiling.
Step #4: HVAC & Plumbing
Rough in all of your connections to make sure they fit before gluing them together. Then, hook up your pipes and connect them to your gray and black water tanks. And don’t forget the waterline for your fridge if you need it.
If you’re using a mini-split system, you should wait to install it until after you’ve finished the walls. Otherwise, start running your ducts and vents, then install the unit. As a last step, test it.
Step #5: Finish the Walls
With all the work done behind the walls, now you can seal it up with 5 mm or plyboard. Again, make sure you cut out space for lighting and outlets to install later. Prime or texture walls as desired before you paint.
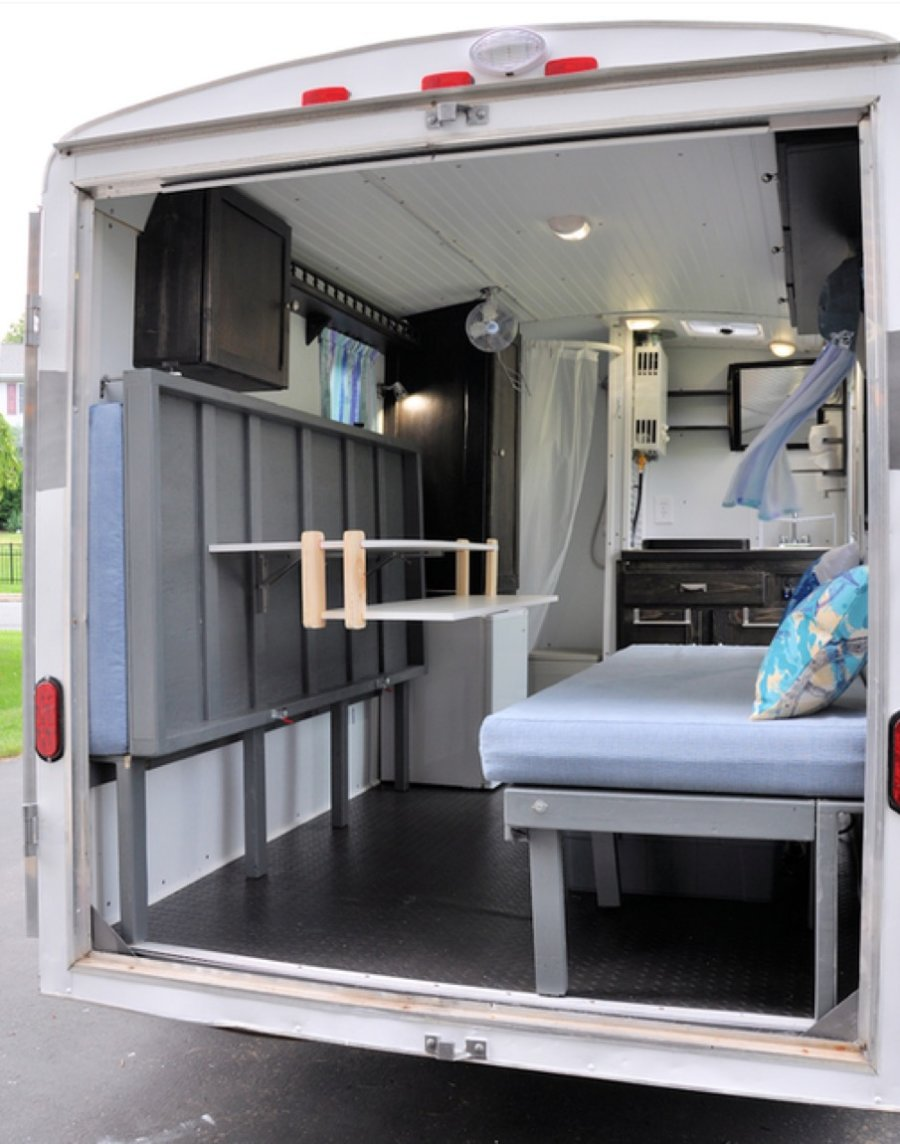
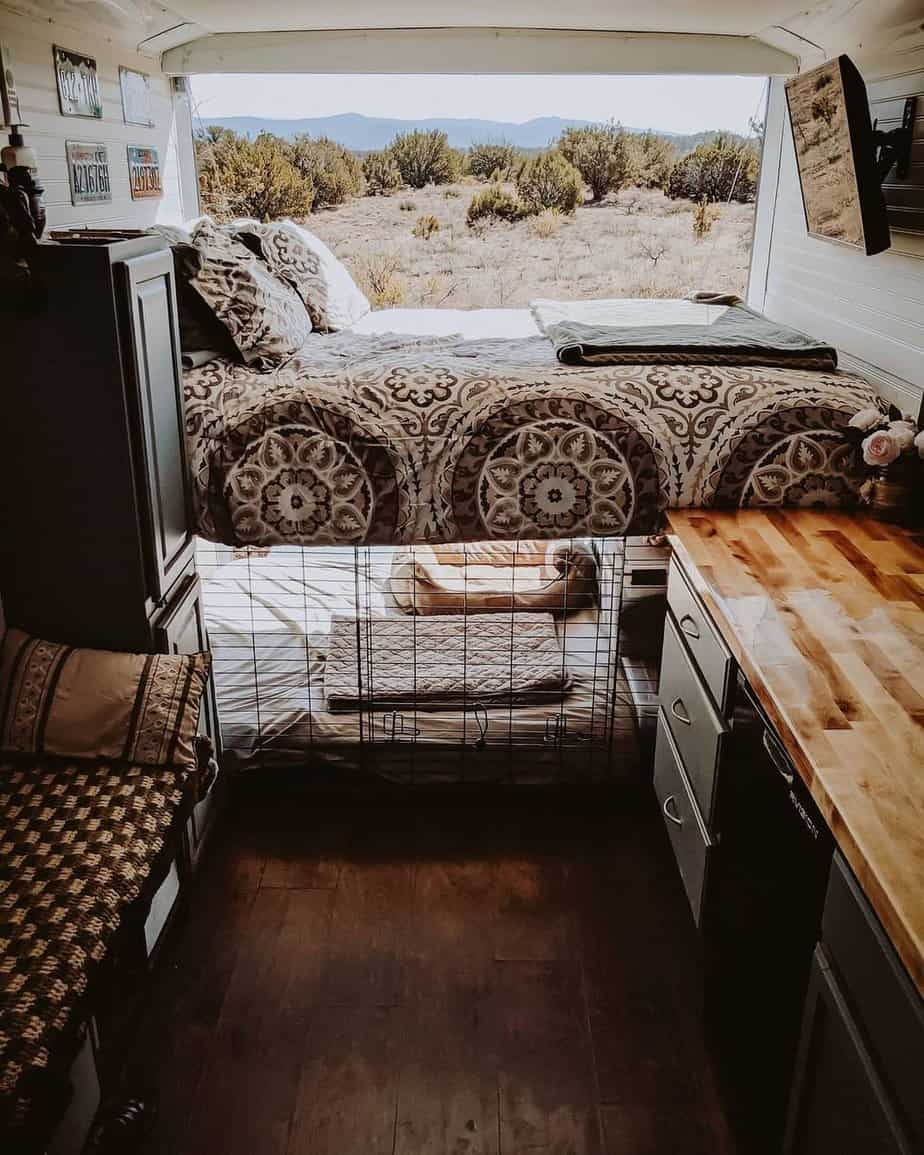
Step #6: Time for Cabinets!
Here’s where you bring your dream camper to life. You get to choose how you configure your space, and the options are limitless.
Make sure to anchor your cabinets to the studs, so they don’t shift in transit. Then, install cabinet clasps, so the doors stay shut as well.
Step #7: Flooring
Now that all the heavy lifting is done, you can put down your floors without fear of ruining them. Then, install the baseboards.
Alternatively, if you’re redoing a small cargo trailer and you don’t plan on using baseboards or quarter-round, you can put down the flooring first – even before insulating – to give it a cleaner finish. You’ll just need to put down a protective layer to keep your floors pristine.
Step #8: Finishing work
Now, it’s time to attend to wrap up the finishing touches. If you have wires hanging from the ceiling, you’ll want to install lighting and outlets.
Next on your list is your appliances! After installation, make sure your appliances work without tripping any breakers. Then, touch up the paint and add your own splash of flavor with decorations and RV accessories.
Step #9: Move in!
You’ve brought your dream camper to life. Now, make it livable. Make your bed. Stock your cabinets. Hook up your tow vehicle. Now, it’s time to explore the open road.
Cause after all that, you deserve a vacation!
Protect Your Hard Work
After you’ve enjoyed the fruits of your labor and returned home, it’s time to protect your hard work.
That RV renovation took a lot of blood, sweat, tears (and time) to complete. And now, you want to make sure it lasts for years to come.
That’s why you’re looking for a place to store it that’s safe from theft, pests, and severe weather.
If you store it in your home garage, you won’t have any room for your daily drivers, lawn equipment, or power tools. If your RV is large enough, fitting it in a standard-sized, two-car garage could be impossible.
That’s where Neighbor can help.
Neighbor is a peer-to-peer RV storage marketplace with storage options that are up to 50% cheaper than traditional storage providers’.
With Neighbor, you can find RV storage options in all 50 states (and you may even find storage spaces in your very own neighborhood).
Find listings from pre-screened hosts nearest you!
Frequently Asked Questions
How to Convert a Cargo Trailer Into a Camper?
You can easily convert a cargo trailer into a camper by adding electrical, a vent, a cot, a basic sink, and carpeting, or you can go big with a full conversion, as we’ve outlined here.
How Much Does It Typically Cost to Convert a Cargo Trailer Into a Camper?
Converting a cargo trailer into a camper can cost between $7,000 and $15,000, making it a more affordable option compared to buying a traditional RV.
Can I Tow a Cargo Trailer Camper With My Mid-Sized Vehicle?
It depends on your camper’s weight and your vehicle’s towing capacity. Usually, yes, you can tow a cargo trailer camper with your mid-sized vehicle.
What Are Some Space-Saving Furniture Options for My Trailer Camper Conversion?
To make the most of the limited space in your cargo trailer camper, consider using elevator beds, Murphy beds, and fold-out futons.
Is It Possible to Have a Fully Functional Kitchen and Bathroom in a Cargo Trailer Camper?
The size of your trailer does matter, but even a 10-foot camper can have a small kitchen and wet bath. It won’t be a fully functional kitchen with a whole suite of appliances, but you can have a small fridge and a microwave with careful planning and smart design considerations.
With these in place, amenities like hot water and a composting toilet can be incorporated.