

The snow is melting. The sun is shining, the birds are singing, and you’re ready to come out of hibernation and explore new places this camping season.
But before you hit the open road, you’ve got to get your RV in shape. You took care of it before winter by winterizing your RV. Now it’s time to dewinterize your RV.
When combined with routine RV maintenance, dewinterization will help you spot problems before they result in the most expensive RV repairs. That means fun, hassle-free camping trips for the season.
So let’s break the ice, and learn how to dewinterize your RV for the 2023 camping season.
Preparing Your RV for the Camping Season

Dewinterizing your RV means undoing all the changes you made when winterizing your RV in the fall. Here are the three basic steps for how to winterize any RV:
- Inspect the RV
- Perform routine maintenance
- Clean the RV water systems
Now, let’s flesh those steps out into a checklist you can use when you dewinterize your RV.
Inspect Your RV
Remove the RV coverings and debris from around, inside, or on top of your RV. To perform a good inspection, you need to be able to see everywhere to do a good inspection.
Roof Inspection
Start at the top. Look for any signs of weather-related damage, cracks, or leaks on the RV’s exterior at the seams and seals. Pay close attention to any cracked caulk along the seams, as this can lead to water damage if left untreated.
Don’t forget to give your air conditioning units some attention as well. Replace the filter, remove the shrouds, and clean the evaporator and condenser coils using an HVAC spray cleaner.
Address any damaged seals or roof coating to prevent deterioration or water damage.
Propane Inspection
Your RV’s propane system powers your furnace, stove, refrigerator, and hot water heater.
To inspect your RV’s propane system, follow these steps:
- Check the propane canisters, lines, and seals for signs of aging, cracking, or damage.
- Check your carbon monoxide detector to be sure it’s functioning properly.
- Check the connections to be sure they are tightened properly
- Refill your tanks, and test the system.
- Smell the air for any notable propane smells to determine if there’s a leak.
If you do not have a carbon monoxide monitor and you do use propane in your RV, then you need to install one before your next trip.
Interior Inspection
When you inspect the interior of your RV, you’re looking for signs of small animals who may have taken up residence during the cold weather and any discoloration that may indicate water damage from a leak outside.

Perform a Routine Tune-Up on the Vehicle
Every vehicle needs routine maintenance to keep running smoothly. With an RV, it’s easy to forget these routine maintenance tasks since your RV isn’t your daily driver. However, if you want your RV to last you a long while, then you’ve got to take care of it.
A good way to stay on top of RV maintenance is a perform a yearly tune-up where you check your motorhome and conduct the needed maintenance.
Check Tires and Wheels
When you inspect your tires, check…
- The tire pressure,
- The tread,
- And for signs of wear and tear.
Properly inflated RV tires not only increase fuel efficiency on the road, but also prevent accelerated tread wear and uneven handling, which could lead to a blowout.
Assess the Engine and Fluids
Before your next epic road trip, go through your motorhome and check its fluids. Sure, there’s the oil, but you also want to check your coolant, transmission fluid, power steering fluid, and windshield washer fluid.
If you don’t want to do this yourself, you can ask an RV inspector or mechanic for a comprehensive fluid analysis, and they’ll do it for you.
Perform Routine RV Battery Care
No one likes turning the key and hearing the dreaded *click* of a dead battery.
But, can you do anything to ensure it doesn’t happen on your vacation? Yes, you can.
Start by verifying the charge of your RV’s battery. If it’s low, you can recharge it with a trickle charger before you hit the road. As a precautionary measure, you can store a trickle charger in your RV.
Dewinterizing RV Water Systems: How to Flush RV Water Lines
If your version of a tranquil morning in your RV doesn’t include accidentally taking a swig of antifreeze, you’ll need to thoroughly flush your RV water lines post-winterization. If you don’t, you risk drinking polluted water, should antifreeze leak into your RV water system.
After all, no one wants their water to taste like antifreeze—even if it’s the non-toxic, RV-safe antifreeze.
Luckily, dewinterizing your RV water systems restores the water systems to potable water status.
The process involves:
- Draining antifreeze from the plumbing
- Flushing the system
- Sanitizing the freshwater system
- And reconnecting the water heater.
But before you even start this process, double-check your water heater.
If you have a propane water heater, confirm that it was in bypass mode or completely disconnected when you winterized your RV. If it wasn’t, you need to follow a different process for cleaning your hot water tank, as the antifreeze may have caused corrosive damage over the winter months.
Okay, let’s start with draining antifreeze from your plumbing system.
Draining the Plumbing: How to Flush RV Antifreeze
To drain antifreeze from your RV’s plumbing system, locate the low-point drains, situated near the water heater and freshwater tank. Put a five-gallon bucket (or other receptacle) under it to catch the antifreeze, and open it up.
Once you drain the antifreeze, you’ll need to dispose of it at a hazardous waste center. Even though it’s labeled as non-toxic, don’t pour the antifreeze down your kitchen sink or a storm drain.
It may not harm humans, but it can still harm the environment to great extents.
Flush the System: How to Flush RV Water Lines
Once the antifreeze is drained, it’s time to flush your freshwater system. There are two ways to do this.
Option #1
The first option for flushing your RV water lines involves your freshwater tank:
- Fill the freshwater tank.
- Turn on the pump to push water through the system.
- Go through the RV, individually turning on each hot and cold knob one at a time. Also, flush the toilet a few times.
- Allow the water to run clear before moving on to the next. Note that RV antifreeze is typically a pinkish color and tends to bubble, so it’ll be easy to see when the system is clear.
Pro tip: Appliances have their own procedures for flushing their systems. So check the manufacturer’s instructions for refrigerators connected to water and washing machines.
Typically, you’ll need to throw away the first few batches of ice or run the washer through a load before regular use.
Option #2
The second way is to use the city water supply. Just hook up a garden hose, turn it on, and follow all of the same steps.
You may be wondering: does this water also have to go to the hazardous waste center?
No, it doesn’t. After you drain the RV antifreeze, all that’s left is the residue. This is a negligible amount that shouldn’t hurt anything.
Sanitize your Freshwater System
Now that the antifreeze is gone, you’ll still have to sanitize your water system with a bleach solution to kill any bacteria that may have started growing during the winter months.
To do so, follow the steps below:
- Fill your freshwater: For every 15 gallons, add ¼ cup of bleach.
- Turn on your pump, and allow the faucets to run until you start to smell the bleach.
- Turn the faucets off, and allow the bleach solution to sit in the lines for 3-12 hours.
- Flush the system with fresh water until you no longer smell the bleach.
From there, your freshwater system will be clean and ready for use!
Reconnect Your Water Heater
With your fresh water system clean and sanitized, it’s time to reconnect your water heater. Open the water heater bypass valve, which will allow water to flow through the water heater. Fill the tank, and then activate the water heater.
Summary
Dewinterizing your RV is a time-intensive process. Plan to spend at least a day dewinterizing your RV. And if you’re storing your RV in a hot climate, you’ll want to review this guide before you begin the dewinterization process.
Following a specific checklist or process isn’t necessarily the key to easy RV de-winterization. More so, it’s how you store your RV in the offseason that affects how time-consuming the dewinterzation process will be.
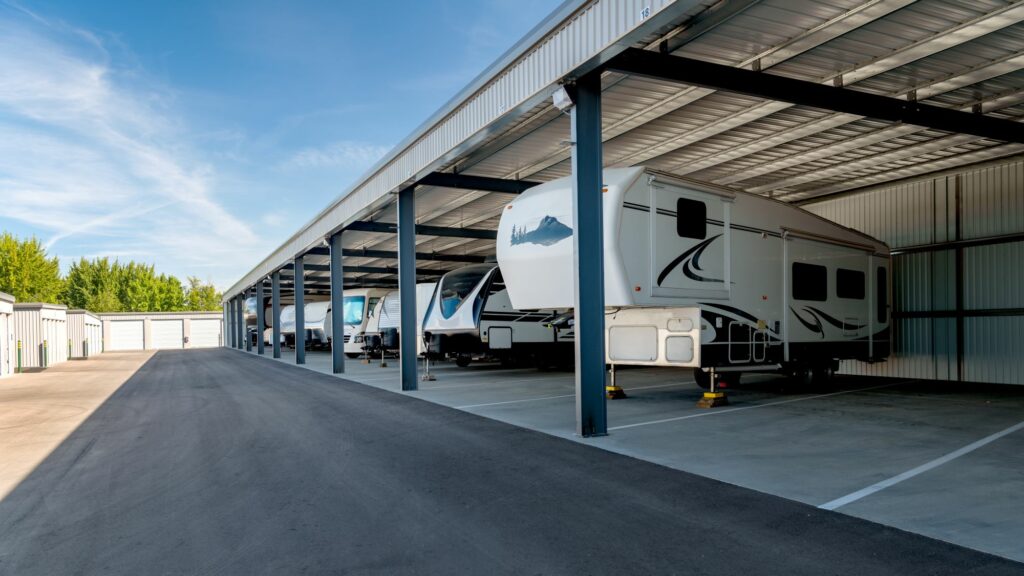
Finding a covered storage space significantly lessens the amount of work you’ll need to do when you dewinterize. When searching for RV storage, you’ll want to choose a location close by; that way, you don’t have to travel far to perform off-season maintenance.
That’s where Neighbor can help.
Neighbor.com is a peer-to-peer storage marketplace that connects Class A, Class B, and Class C RV owners with nearby storage solutions. You can find safe, close storage for your RV in the offseason right next door at Neighbor.com.


