You want your RV bathroom to look like the inspiration page on Pinterest: fresh, clean, and uncluttered (but stocked with plenty of hidden storage, so everything has its place). To achieve that Pinterest-worthy look, you’ll need to get creative with some RV remodel bathroom ideas that maximize your space–without requiring a full camper demolition.
We’ll walk you through 9 innovative RV bathroom ideas that have savvy storage hacks, seamless style, and ultimate utility.
But first, you need to clearly define what you need and how far you’re willing to go to get it.
Quick DIY RV Bathroom Remodel Tips for Beginners
Before you dive into an RV remodel, you need to understand that it’s not always as cut and dry as a home remodel. You’d hate to start remodeling only to cause damage during the demolition process. On the same note, you wouldn’t want to finish an epic camper bathroom remodel on your new trailer only to find that you need a new towing vehicle (a towing vehicle you can no longer afford because you chose to sink your savings into the renovation).
So, before you whip out the power tools, here are some quick DIY RV bathroom renovation tips to tuck into your tool belt.
- Be extra cautious during demolition: Always be aware of outer storage access panels and outdoor amenities, like an outdoor entertainment center or an outdoor kitchen located on the other side of the wall. Always be aware of what you’re taking out and how it affects the area around it as well.
- Be prepared to pay more: This isn’t to say you can’t do an awesome budget remodel. But typically, the shower forms, doors, toilets, etc., come in custom sizes that have to be specially ordered. So don’t walk into Home Depot and expect to go home with a shower door for your camper.
- Don’t overload your trailer with upgrades: Keep in mind your cargo carrying capacity (CCC) and your vehicle’s Gross Vehicle Weight Rating (GVWR) before your remodel. Take care not to add too much weight you’re adding to your RV as you’re remodeling.
Whether you’re a beginner or a seasoned renovator, having a plan, being resourceful, and understanding the basics of demolition and installation can truly make a difference
First, Maximize Your RV Bathroom Space with Smart Storage
In the compact world of RVs, every inch counts. Consider using…
- Corner shelves for your bathroom essentials
- Hidden cabinets that use empty space behind walls
- or tiered towel racks to maximize storage so everything has its place.
These are not just smart moves—they’re absolute game-changers for your bathroom!
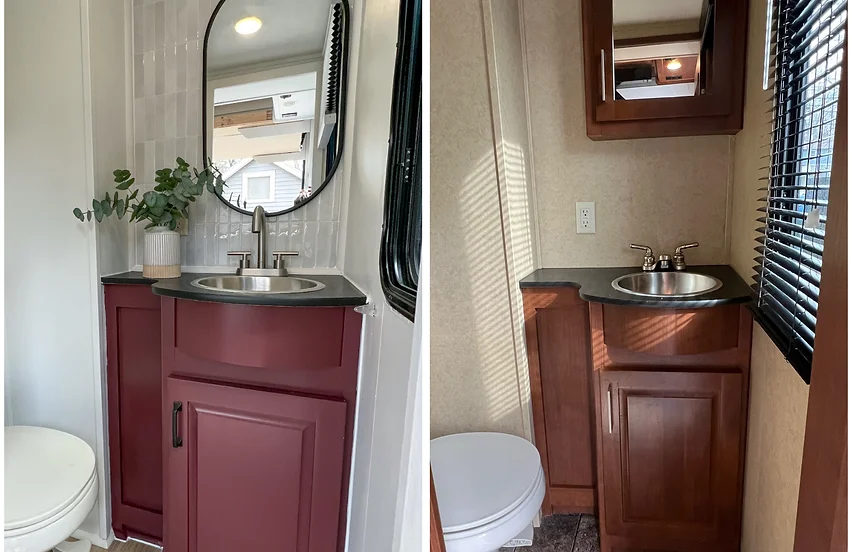
Photo courtesy of Home | RV Family Renovators
Project Idea #1: Install Sleek Corner Shelves for Essentials
Placing corner shelves in your shower helps you free up cabinet space by keeping essentials in the shower. But you can also use them in a bare corner to hold washcloths, soaps, or other bathroom accessories.
Project Idea #2: Install Hidden or Inset Cabinets
Hidden or inset cabinets, take advantage of empty space behind a wall. Now in a camper, it’s likely only going to be 3-4 inches deep, but that is enough space for a medicine cabinet.
You can see how Rachel from Spaces by Rachel installed an inset cabinet here.
During
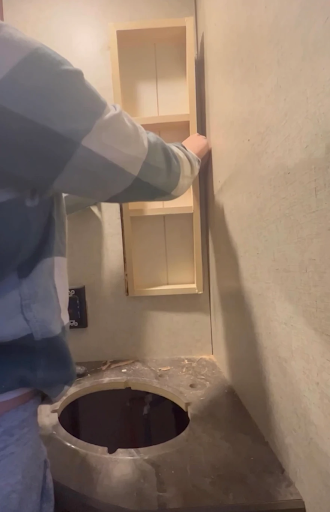
After
Photos courtesy of rvfamilyreno.com
Next, you could install a mirror that’s both a mirror and a medicine cabinet (a great way to kill two birds with one stone).
Project Idea #3: Install a Tiered Towel Rack
A wall-mounted rack with multiple bars or a swivel rack like the Triple Swing Arm Towel Bar by Signature Hardware is a space-efficient solution that doesn’t take up a lot of wall space.

Photo courtesy of Signature Hardware
They allow multiple towels to dry, which makes it a great choice for families.
The key is to make efficient use of vertical space. A vanity with a built-in towel bar can also help keep towels at hand without taking up additional wall space.
Project Idea #4: Use Easy as Peel and Stick Tiles
One of the easiest ways to do this is by using peel-and-stick tiles. These can be applied to both walls and floors, offering an easy installation process and maintenance.
They’re also lighter than regular ceramic tiles making them a good option for RV bathroom remodels.
Chic Backsplash Ideas
For an elegant and stylish backsplash, peel-and-stick tiles offer several designs. You can opt for the timeless white subway tile design, the sleek metallic finish, or a colorful, trendy design that you can switch out in a few years
.

Photos courtesy of The Home Depot
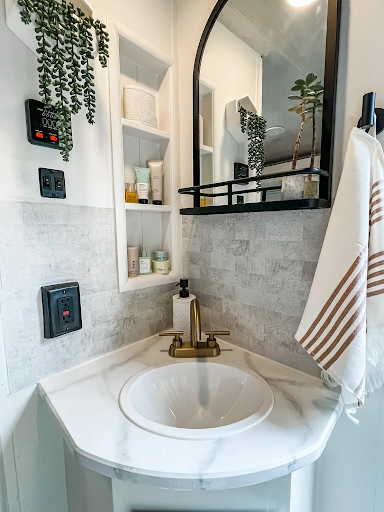
Project Idea #5: Update Your Fixtures (Faucets, Light Fixtures, etc.)
Fixtures are another aspect to discuss. The right RV faucet and light fixture can make a vast difference in your RV bathroom’s look and feel.
Sink Fixtures/Faucets
When it comes to faucet choices, the options are endless. Just make sure you choose one that fits your current sink setup for an easy installation. Most RV faucets measure 4 inches between the hot and cold water hookups.
Here are a few examples:
Example #1: Deveral 4 in. Centerset 2-Handle High-Arc Bathroom Faucet with Drain Kit Included in Matte Gold (Available at the Home Depot).
Example #2: Harlow Brushed Nickel Pvd 4-in centerset 2-handle WaterSense Bathroom Sink Faucet with Drain with Deck Plate (Available at Lowes).

Photo courtesy of Lowes.com
Example #3: Pfister Masey Tuscan Bronze 4-in center set 2-handle WaterSense Bathroom Sink Faucet with Drain and Deck Plate (Available at Lowes).
Light Fixtures
Light fixtures, too, have a significant impact on how your RV bathrooms feel. Make sure you install your fixtures to shine over the mirror so that you’re not backlit. That way, shadows won’t cast down onto your face while applying makeup or washing your face.
And if you’re looking to splurge on something, you should check out this dimmable mirror lighting from KeonJinn. The mirror has dimmable lighting built in and allows you to apply makeup in a light setting that reflects the evening’s festivities.
You can choose a bright light setting for daytime activities. Warm lighting for dinner out and a dim setting for mood lighting.
Project Idea #6: Update Your Shower Curtain or Install Glass Doors
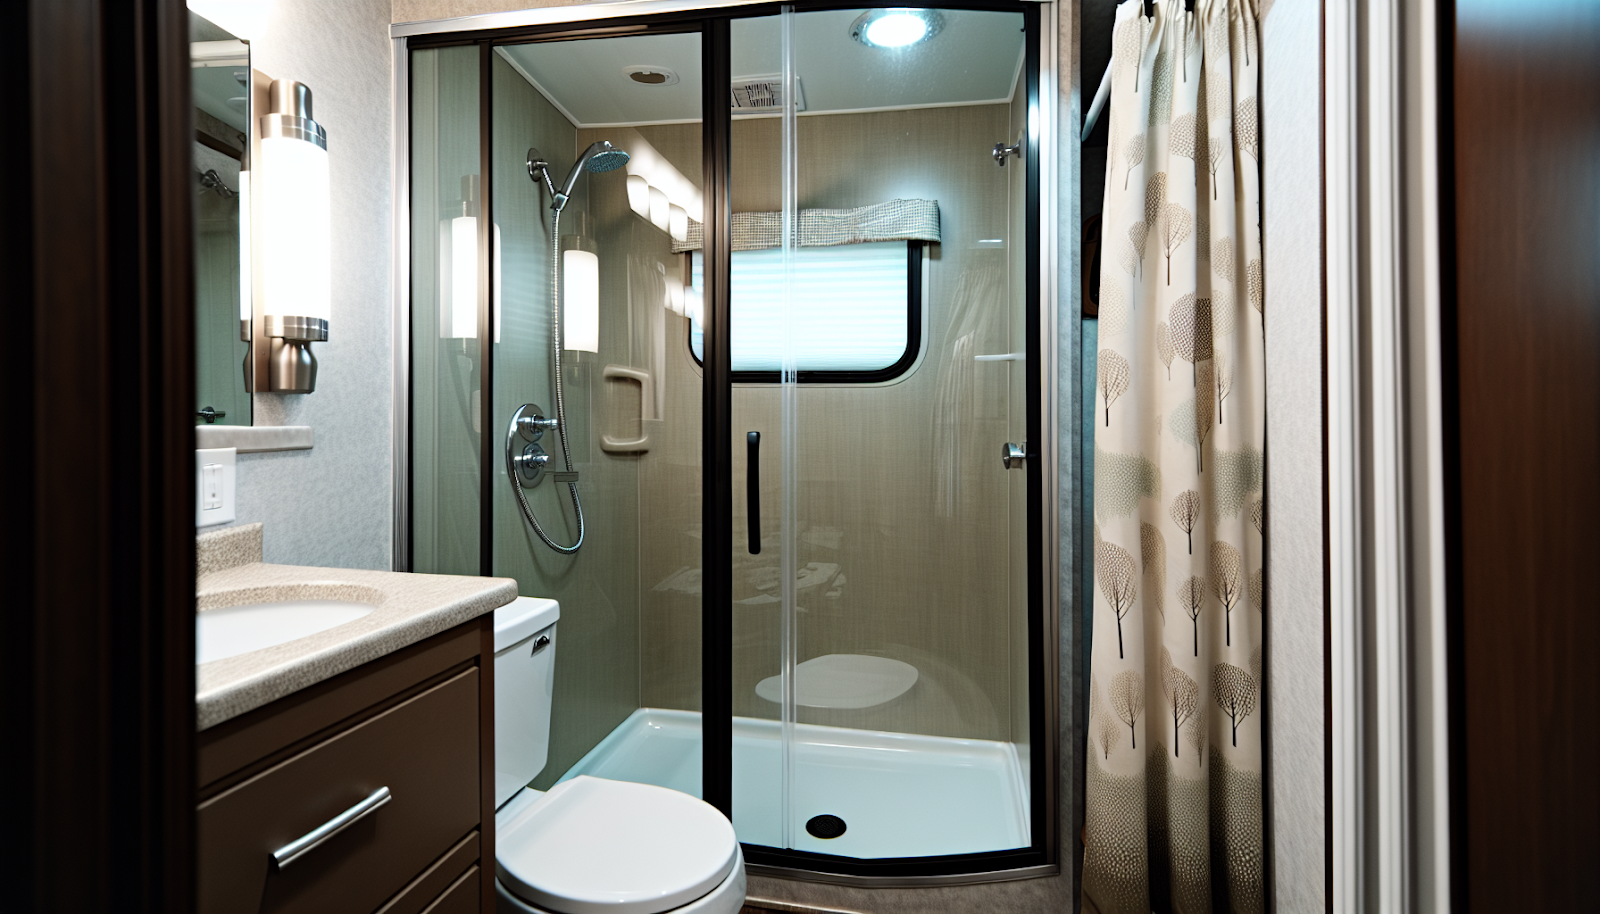
Whether you’re looking to replace your shower pan or remodel the whole shower stall, a well-planned and executed shower remodel includes choosing between a shower curtain and a glass door.
Is Glass or a Curtain Best for an RV Shower Remodel?
The shower curtain is quick, easy, light, and cheap. If you get tired of it, you can easily change it out for a new one. You, also, don’t have to worry about it shattering when you travel either.
But a nice glass door brings some elegance to your tiny RV bathroom. Yes, the glass doors are more expensive–but they keep water from spraying out better. Plus, they don’t facilitate mold growth quite like a shower curtain does.
If you’re worried about mid-trip shattering, averting mishaps is as simple as taking a few precautions –like making sure it’s closed and secured before departure.
Project Idea #7: Replace Your Shower Head
This is a super simple upgrade that doesn’t cost a lot. Plus, those family members with thick hair will thank you. Switching to a shower head that has multiple settings provides better water pressure which makes it easier to rinse shampoo and conditioner out (without leaving suds behind).
Project Idea #8: Get Creative with Paint
Paint is one of the easiest, cheapest ways to freshen up your RV. When it comes to color schemes, light hues like taupe, grays, and classic white invite light to bounce around and make your RV bathroom appear larger.
Implementing the 60-30-10 rule in color schemes allows for accents to be incorporated without making the space feel cramped. Ideally, you want the lighter color (the main color) to be 60% of the space. Your secondary color, on the other hand, should cover 30% of the painted area, while the accent color will only make up 10% of the total wall space.
When you stick with 60-30-10, your accent wall brings personality without overpowering the tiny bathroom
Renovation Pro Tip: Beware of Replacing your RV Sink with a Premade vanity…
Pre-assembled vanity and countertop combos are great for the weekend warrior’s home renovation. But when it comes to RV renovations, you have to be more intentional.
The premade stuff uses heavier materials like solid surface, marble, or granite in their kits (in addition to glass/ porcelain sinks). They’re beautiful materials, but they’re more fragile and weigh a lot more than laminate, acrylic, or heavy-duty plastic.
If you’re not careful with what you put into your RV, you could find yourself maxing out your GVWR.
But if you weigh what you take out during demolition, and don’t put more weight in than you took out, you should be golden.
Before You Start Your Remodel…
In conclusion, renovating your RV bathroom makes a huge difference in your quality camper time. And these camper bathroom ideas are sure to inspire you in your own renovation. But after you’ve done all that hard work, you need to protect it.
Storing your camper properly means you can enjoy your hard work for years to come. That means finding safe storage that covers your camper to protect it from weather damage and subsequent leaks.
That’s where Neighbor can help.
Neighbor.com is a peer-to-peer storage marketplace that provides budget-friendly storage units close to home, so you can keep your RV safe.
doesn’t have to be daunting. With the right ideas, a dash of creativity, and a sprinkle of hard work, you can transform your RV bathroom into a stylish and functional space. So why wait? Hit the road with confidence and enjoy the journey!
Frequently Asked Questions
How Much Does It Cost to Replace the Shower in an RV?
Replacing an RV shower enclosure can cost anywhere from $279 to $1,300. You can also make improvements by replacing the showerhead.
What Are Some of the Benefits of Using Peel-And-Stick Upgrades in My RV Bathroom?
Peel-and-stick tiles are beginner-friendly, budget-friendly, and are, overall, very low-maintenance.