

Water bath canning is a processing method used to preserve high-acid foods. Jars are filled with food, sealed loosely with a lid, and boiled for a specific amount of time. Some examples of acidic foods include applesauce, jams, jellies, pickles, relishes, chutneys, salsas, and tomato products with added acid. Canning is great for preserving seasonal produce and extra produce from your garden.
In this guide, we’ll discuss what you need for water bath canning, the seven steps to preserving high-acid food, and some commonly asked questions about canning.
Equipment and Supplies for Water Bath Canning
Specific equipment is required for safe water bath canning. However, some equipment you need may include utensils you already have in your kitchen. Use the complete supply list below as your personal checklist before getting started.
- Water bath canner or a large, deep sauce pot with lid and bottom canning rack
- Glass canning jars with matching lids and screw bands
- Kitchen utensils, including a paring knife, ladle, and wooden spoon
- Ingredients, such as fresh fruits or vegetables, to complete your recipe
- Bottled water, especially If you have hard water
- Jar lifter or tongs
- Home canning funnel
- Headspace tool (but a rubber spatula, orange peeler, or chopstick can substitute this)
- Timer
- Moist, clean towels or paper towels
- Food strainer or cheesecloth
- Potholders
- Cooling rack or additional towels
Pro Tip:
Canning recipe ingredients often include a significant amount of sugar, unflavored gelatin, pickling salt, and vinegar. Check which preservatives your recipe needs before you start.
Is It Safe to Purchase Used Supplies for Water Bath Canning?
Used equipment can be a great way to save money on canning supplies. However, it’s important to inspect the supplies to make sure they’re safe for use.
Before buying used canning supplies, take steps to make sure you don’t overspend or buy useless products. Begin by researching prices of new canning supplies so you’ll know how much money you’re saving. Used glass jars are typically safe if they’re designed for canning and have no chips, cracks, or nicks. Inspect the matching rings for rust on the inside threads. However, do not buy used lids. Canning lids can never be reused. When purchasing a used water bath canner, watch for deep dents or potential leaks. If possible, locate a boiling water canner that includes a canning rack.
Where Can I Find Safe Recipes for Home Canning?
When preserving foods, it’s vital to use tested recipes to ensure safe and reliable results. Websites and cookbooks from well known, reliable sources are tested for safety.
Any website or cookbook author can share recipes designed for home canning. That’s why it’s best to use sources from trusted companies with a history in the preservation industry. Large companies like Kerr, Ball, Heinz, and magazines like Better Homes and Gardens or Good Housekeeping use test kitchens to prepare recipes before publication. Additional resources can include government extensions like the USDA.
Preparation and Safety Steps for Water Bath Canning at Home
Home canning is a perfectly safe way to preserve food. Still, it’s important to take careful safety measures to avoid injury or the potential risk of food poisoning from improper procedures. If you’re new to canning, taking these steps can help ensure the process goes smoothly.
- Ensure you have bright lighting and sufficient countertop workspace in your kitchen.
- Gather all supplies on an easy-to-reach counter or table.
- Examine your fruits and vegetables closely to ensure you remove all brown spots, bugs, and debris before cooking.
- Triple check your recipe and make sure you follow the exact instructions.
- Determine the full time for each canning run by adding the processing time plus an additional 25 minutes to heat the water, approximately ten minutes to return water to a full rolling boil after adding jars, and five minutes of cooling time.
- Inspect your jars for factory defects, cracks, chips, or age. Also, inspect the lids and screw bands for defects and excessive rust.
Food Safety in Home Canning and Preserving
Proper canning techniques are vital for safely preserving any type of food. However, improper preparation of fruits and vegetables can doom your operation from the start. It’s important to take proper care when selecting, preparing, and mixing foods for home preservation. Follow these tips:
Choose Healthy, Ripe Fruits and Vegetables
When selecting fruits and vegetables for canning, choose items that are ripe but still firm. Overripe fruits and vegetables are likely to have more bruising and can turn mushy after processing.
Avoid Waxed Produce
If you purchase items for canning, avoid waxed produce. Brine and syrup won’t penetrate these pieces unless they’re peeled.
Don’t Use Old Produce
For the best flavor and quality results, use your fruits and vegetables shortly after harvesting or purchasing them.
Do Not Allow Food to Soak
You should wash and rinse your produce before canning. However, it’s important to avoid leaving fruits and vegetables to soak because nutrients may be lost.
Remove Potential Contaminants
Peel fruit or vegetables, if necessary. Remove the seeds and cut away bruised sections. Cut unblemished fruit and vegetables into serving sizes to match your recipe.
Understand the Details of Hot and Raw Packing
Using a raw packing method requires you to tightly pack raw fruits or vegetables into jars and then pour boiling water, syrup, or brine over the product. Hot packing requires you to heat food to boiling or cook it for a specified time, then packing it into jars with boiling liquid. When you’re hot packing, food should be loosely packed.
Ensure Your Recipe Is Designed for Water Bath Canning
Many home canning recipes require vegetables that must be preserved in a pressure canner. These recipes are not interchangeable.
Pro Tip:
Water bath canning cannot be used in place of pressure canning. Only acidic food products (from natural acid or acid added while canning) can be safely preserved using the water bath canning method. Low-acid foods, on the other hand, must reach an internal temperature of 240 degrees, which can only be achieved with a pressure canner.
Step-By-Step Guide to Water Bath Canning
After finding the perfect recipe, you’re probably excited to get started on your home food preservation experiment. When preserving food, it’s vital to take careful steps to avoid the potential risks related to spoiled or contaminated foods. Follow these steps for a safe experience and food that will be delicious for months to come.
1. Inspect the Jars, Lids, and Rings
Canning jars can be used year after year for the successful preservation of foods at lower prices. But it’s vital that you inspect both used and new jars for imperfections. Examine each jar for hairline cracks, chips, or bubbles in the glass. Defective jars are more likely to break during processing.
Rings can be used over and over without taking on significant damage. Rust is common, but it’s not a concern unless it’s excessive, since rings never touch the food. Although new lids are always required, it’s important to give them a quick check to ensure they aren’t bent or scratched and that they don’t have damaged seals.
2. Prepare the Equipment for Use
During the water bath canning process, it’s important to have everything you need at arm’s reach. Follow these steps:
- Both new and used jars must be washed and kept warm. This can be done by hand or in the dishwasher. Rings and lids should be washed in soapy water and thoroughly rinsed and dried. Lids should not be boiled unless otherwise specified by the manufacturer.
- Get your canner or stockpot ready. Place the wire rack in the bottom of the pot and add enough water to cover the tops of the jars you’re using by at least an inch.
- Heat the water while getting the rest of your supplies ready. It will take 20 to 25 minutes to heat water to 140 degrees for raw packing or 180 degrees for hot packing.
- Prepare your produce by washing and chopping it. All measurements must be followed exactly. Smaller jars may be used but avoid using larger jars, and the processing time will remain the same unless specified in the recipe.
Pro Tip:
If the processing time on your recipe is less than 10 minutes, your jars must be sterilized before use.
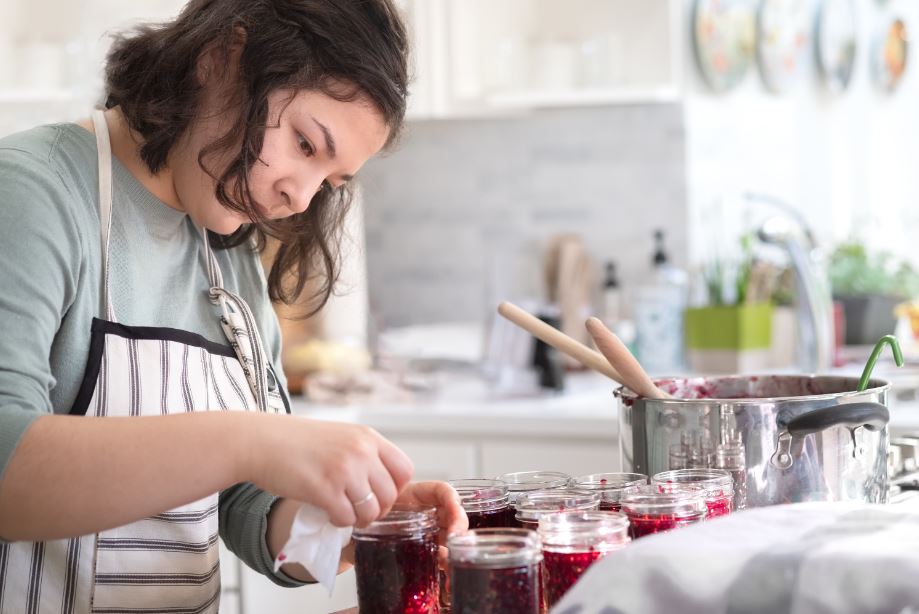
3. Fill the Jars
Fill clean jars with your prepared produce. If you’re hot packing, take care to avoid burn injuries with potholders, careful prep, and proper tools. Quickly ladle your recipe into canning jars, and make sure you don’t fill the jars to the jar rim. The empty space between the food and the jar’s lid is called headspace.
This space is needed because the heat will cause the jar’s contents to expand. Without proper headspace, food can seep under the seal and interfere with proper sealing. The amount of headspace you should leave will be specified in the recipe (usually between 1/4″ and 1″).
Next, run a clean spatula or chopstick (your headspace cleaner) around the jar’s interior to release trapped air bubbles. Wipe the jar rim with a clean towel or paper towel to remove traces of food from the rims.
4. Apply Lids and Rings
Place the lids on the jars. Stacked lids often stick together, so take care to ensure you don’t have two lids on any jar. A magnetic lid wand can make it easy to grab lids one at a time and avoid burns from hot-packed recipes.
Next, screw the bands onto the jars until they’re finger-tight. The bands should be tight enough to be secure while still loose enough for excess air to escape.
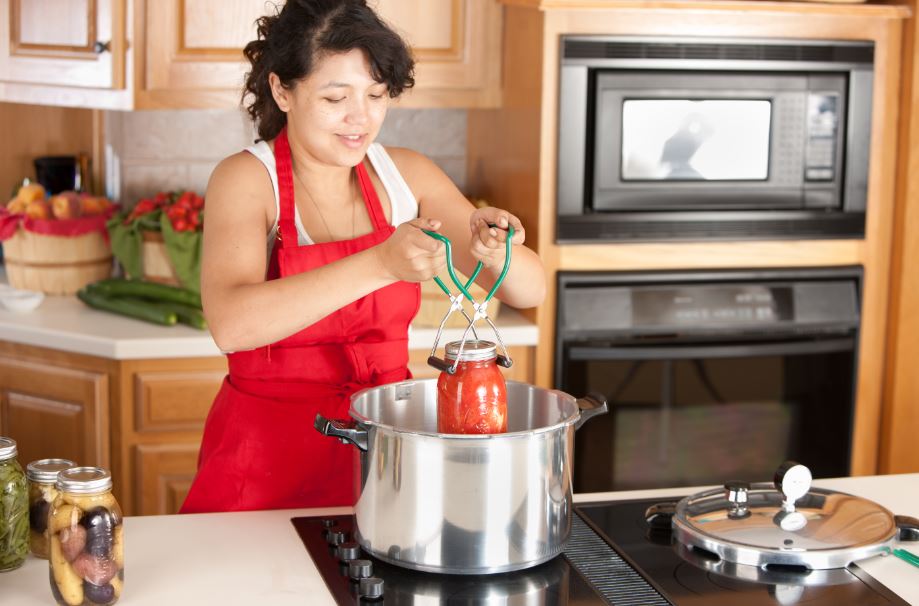
5. Process the Jars in the Hot Water
When you’re placing jars into the pot, it’s important to keep them vertical to avoid food contact with the rim of jars. If you’re using a wire rack with handles, load the jars and place the loaded rack into the water bath. If you have a bottom rack already in place, use tongs or a jar lifter to carefully place jars into the boiling water. Never place jars in a boiling water bath with your bare hands.
There should be at least one and a half inches of water covering the jars. If necessary, add more hot water to cover them. There should be at least 1/2 inch of space between the jars to allow proper heat circulation.
Pro Tip:
It’s a good idea to have a kettle or other container of boiling water on hand while water bath canning. Having hot water on hand when you need it can help the process go smoothly.
When the jars are in place, turn up the heat and bring water to a full rolling boil. Place the lid on the pot and set your timer according to the processing time in your recipe. If the water is boiling too vigorously, turn down the heat to reach a more gentle but still full boil.
6. Allow the Jars to Cool
When the processing time is complete, turn off the heat and remove the lid, but leave the pot undisturbed. Leave processed jars to settle for five minutes after processing, and place clean towels or a cooling rack on a nearby counter. After the jars have settled, remove the jars in their rack or carefully lift them using tongs or a jar lifter. The jars will be very hot, so it’s important not to touch the glass, screw bands, or lids while moving processed food.
Carefully place your hot jars on towels or cooling racks, leaving an inch of space between jars. Do not press on lids or tighten the screw bands at this time. Instead, let the jars cool undisturbed for 12 to 24 hours. You will hear occasional popping or pinging sounds as the lids flex and seal.
Pro Tip:
Avoid placing hot jars directly on a counter or table, or in a drafty place. Sudden changes in temperature (which is called temperature shock) can cause jars to break.
7. Test Lids and Store Food Properly
After cooling, test the lids with a fingertip to ensure they’re sealed. Sealed lids won’t wiggle or pop when you put pressure on them. They should feel completely firm. Unscrew the rings and put them aside for cleaning and storage. Once the jars are sealed, the rings aren’t necessary to keep food fresh. You can test the lids again by picking up each jar from the edge of the rim. The tension of the seal should hold the lid in place.
Next, wipe down the properly sealed jars to remove any residue from the canning process. Store processed food in a cool, dark place for up to one year. For the best food quality, storage temperatures should be between 50 and 70 degrees. Avoid storing jars in temperatures above 95 degrees, in direct sunlight, near hot pipes, a range, or the furnace, or in an uninsulated attic.
Do I Have to Throw Away Preserved Food If the Lids Don’t Seal Properly?
Probably not. As long as it’s been less than 24 hours since your processing time was complete, you can refrigerate or reprocess the jars.
If you only have one or two lids fail, you can refrigerate the failed jars immediately and consume them in the typical shelf time for refrigerated food. Alternatively, as long as it’s been less than 24 hours, you can process the failed jars again using the same method. Just note that you’ll need new lids. New jars can be used, too, but it’s not necessary unless the original jar was damaged.
Additional Tips for Water Bath Canning
Tips for Water Bath Canning Recipes
- Prevent light-colored fruits from darkening by putting them in a commercial solution or a solution of one teaspoon of vitamin C added to a gallon of water until you’re ready to prepare your recipe or pack jars.
- Jellies are made using fruit juice clear of pulp and sediment. This can be accomplished by squeezing the juice through a cheesecloth.
- Some tomato-based products like spaghetti sauce with meat or certain salsas cannot be preserved with the water bath canning method because so many low-acid ingredients have been added.
- For fruit recipes that include sugar, use white sugar unless brown sugar is specifically called for in the recipe.
- When you include spices in a canning recipe, whole spices provide the best flavor and avoid clouding the product.
- When pickling, don’t water down vinegar to create a milder taste. The preservative effect of vinegar will be weakened. Instead, add sugar to change the taste.
- Salt is essential to the fermentation process when pickling. This means it’s necessary to follow exact measurements for salt content.
- While tomatoes can typically be considered a high acid food, growth conditions can lower the acidity. It is recommended that lemon juice or citric acid be added to each jar of tomatoes so you can safely process them in a water bath canner.
Tips for Water Bath Canning Equipment
- Your canner should have a tight-fitting lid, and the base shouldn’t be more than four inches wider than the diameter of your stove’s burner.
- Commercial food jars should never be used for canning.
- Do not tighten rings on jars after processing. Tightening the rings can flex the lid and break the seal.
- Always label jars with the contents, date, and batch number to allow easy traceability if one jar spoils.
Proper Disposal of Spoiled Food
While properly preserved food typically remains fresh throughout the expected storage time, many factors can spoil food. When you prepare to consume home-canned foods, it’s essential to scrutinize each jar for spoilage. Inspect the sealed jar for leakage, a bulging lid, or visible mold inside the jar. Rising air bubbles or unnatural colors are also an indicator of spoilage. Upon opening, look for spurting liquid, mold, or an unusual odor.
Warning!
Never taste foods that show signs of spoilage! Harmful toxins, mold, and chemicals can cause serious illness or even death.
Fruits, jams, and jellies are high-acid foods, but it is still considered unsafe to scrape away mold and eat these products. Fortunately, high-acid foods do not produce the toxin that causes botulism. Therefore, you can simply write on closed jars that the food is spoiled, pack jars in a heavy garbage bag and dispose of them in your regular trash.
When tomato products grow mold or show signs of spoilage, they should be treated as low-acid foods. If the jars are still sealed with no leakage, you can safely dispose of them with the same technique as high-acid foods. If seals are broken, jars are open, or leakage is present, the food should be detoxified before disposal.
The Detoxification Process for Spoiled Preserves
Begin by protecting your hands with heavy disposable rubber or plastic gloves as botulinum toxins can enter through openings in your skin, and this contact can be fatal. Follow these steps to detoxify food and clean potentially affected surroundings safely.
- Carefully place contaminated containers and lids on their sides in a stockpot, pan, or water bath canner.
- Thoroughly wash your hands with gloves still on.
- Slowly add water to the pot to avoid splashing until water is at least 1 inch above the jars.
- Put the lid in place, and bring water to a boil.
- Boil the jars in a boiling water bath 30 minutes to ensure complete detoxification.
- Cool, and discard containers, lids, and food into the trash or a nearby landfill.
- While still wearing gloves, prepare a solution of one part bleach and five parts water to clean affected surfaces.
- Thoroughly wet contaminated areas with a bleach solution and let it sit for 30 minutes.
- Soak your utensils in the bleach solution for 30 minutes.
- Wearing gloves, carefully wipe up treated spills with paper towels, without spreading liquids/contamination.
- Place soiled paper towels in a plastic bag before disposing of it in the trash.
- Reapply the bleach solution to all contaminated surfaces and equipment and let it sit for another 30 minutes.
- Rinse thoroughly.
As a final step, thoroughly wash all decontaminated surfaces and equipment. After the cleaning process is complete, dispose of gloves in the trash.
While it’s unusual for properly canned food to spoil, it’s essential to know the proper disposal techniques to protect yourself, your family, and other people and animals. Never dispose of spoiled food outdoors or in a regular compost pile since animals may be tempted to eat it. Understanding safe disposal techniques is an important part of your home water bath canning knowledge.
Enjoy Homemade Preserves in No Time
Water bath canning is a safe way to process high-acid foods. It’s also an excellent way for beginners to learn the process of home canning without using a pressure canner. Water bath canning is a practical way to save money on your favorite foods and create delicious new recipes. If you’ve always been interested in home canning but don’t know where to start, water bath canning might be for you.
