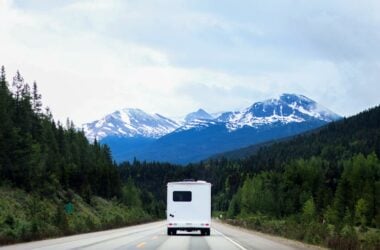
Through the spring, summer, and fall, you enjoyed priceless adventures in your trusty travel trailer.
Now, as the traditional camping season draws to a close and winter arrives, you may have decided that winter camping isn’t for you.
To ensure your camper is ready to use when spring comes around again, you’ll need to know how to winterize a camper and prepare it for storage.
The winterizing process can be tricky, especially for a new RV owner. Therefore, follow these critical steps to ensure your camper is safe and protected through the winter months.
What are the steps for how to winterize a camper? The basic checklist includes these steps:
- Drain and Clean Your Water Tanks
- Drain Your Water Lines and Hot Water Heater
- Winterize Your Plumbing System
- Wash Out the Sewer Hose
- Clean Out Your Camper Completely
- Empty the Refrigerator
- Unplug All the Electronics
- Make Sure Your Propane Is No Longer Connected
- Seal All the Gaps
- Clean the Awning
- Wash and Wax Your Trailer to Have It Looking Its Best
- Choose the Right Location for Your Camper
- Tuck Your Camper in for the Winter
What to Do Before You Start Winterizing Your Camper
Before getting started on the process of how to winterize a camper, schedule any necessary maintenance and repairs, including the following:
- Schedule having a professional install a water heater bypass kit or a water pump converter kit.
- Install any upgrades.
- Contact an RV repair technician to make any necessary repairs.
- Give your camper a professional maintenance check.
How to Winterize a Camper
Step 1: Disconnect All Electricity: Batteries and Solar Panels
During the travel trailer winterization process, the most important thing is to stay safe. Therefore, your first step should always be disconnecting your electrical system, including your batteries and solar panels. Store your RV batteries in a cool, dry area where the temperature is between 50 and 90 degrees year-round.
You can leave your solar panels attached to the top of your camper’s roof but disconnect all electrical wires. Be sure to cover the panels with a protective tarp if you plan to leave them atop your roof.
Step 2: Drain and Clean Your Water Tanks
You’re ready to winterize your water tanks once your electricity, batteries, and solar panels are disconnected. Most travel trailers will have three water tanks you need to drain and clean:
- Fresh Water Tank
- Black Water Tank
- Grey Water Tank
Your camper should be parked at a campground or dumping station with the sewer hose connected throughout the entire tank draining process.
- First, drain the fresh water tank by removing the low-point plugs and opening the low-point drain valves underneath your camper.
- Open the low-point drain for the freshwater tank to ensure maximum drainage.
- Next, drain the grey water tank and black tank.
- After draining the black water tank, flush the tank until you see clear water coming out of the sewer hose.
Step 3: Drain the Water Lines and Hot Water Heater
Once you’ve drained the black, gray, and freshwater tanks, you must clean out your water lines and hot water heater tank. The best way to do this is by completely draining the water lines and water heater tank. Any water left in your lines or tank could freeze and expand during the winter, causing them to burst.
Draining the Water Heater
To drain your water heater, close the inlet valve near the heater to prevent water from flowing to the tank. Next, turn the water heater off and give it time to cool down. After several hours, remove the anode rod or your water heater’s heating element near the bottom of the heater tank and allow the water inside of it to drain out.
You may also need to open your water heater’s pressure relief valve to ensure all the water in the tank drains out.
Draining the Water Lines
Next, turn off your camper’s water pump and open all of your kitchen and bathroom faucets. Leave the faucets open while the water inside the lines slows to a trickle and then disappears. If you’re lucky enough to have a washing machine and dishwasher in your travel trailer, you’ll also need to drain those.
Step 4: Winterize Your Camper Plumbing System
When it comes to your RV plumbing system, you have two choices for winterizing: antifreeze or compressed air. Both methods will help protect your pipes against freezing throughout the winter, and each has advantages and disadvantages.
While your plumbing systems and holding tanks are the most prone to damage if they aren’t winterized correctly, you won’t want to skip this step (even despite the risk involved).
*Note: If you use antifreeze to winterize your camper’s plumbing system, keep in mind that you will have to blow out the antifreeze again at the end of the winter (or before you use water in the camper again).
Option #1: Using Antifreeze to Winterize Your Camper’s Plumbing System
Antifreeze can help prevent your lines from freezing and ensure that any water remaining in your plumbing lines will not freeze. Before you add antifreeze, you must bypass the water heater, as the antifreeze that trickles into the hot water tank can cause irreparable damage.
Pro Tip for Bypassing Your Water Heater: Some campers come with a water heater bypass already installed. If you don’t know whether or not yours has one, check with a professional before adding antifreeze! If yours does not have a pre-installed water heater bypass, you will need to install one before proceeding.
When winterizing your camper’s plumbing system with antifreeze, make sure you buy two to three gallons of non-toxic camper or RV antifreeze and perform the following steps:
- Close all your water faucets and ensure your water heater is turned off.
- Locate your camper’s water pump. Consult your owner’s manual if you aren’t sure where the pump is located.
- The pump should have a hose attached to the pump at one end and plugged at the other.
- Remove the plug and dip the end of the hose into a bottle of antifreeze.
- Close the pump valve traveling to the fresh water tank, and open the valve on the end of the antifreeze hose.
- Turn on the water pump to pump antifreeze into your plumbing system.
- Open each hot and cold faucet in turn until you see the antifreeze coming out. Do this with every faucet in your camper, including outdoor showers.
*Note: Once you’re finished, pour a few cups of antifreeze down every water drain and toilet bowl in your camper to keep any water remaining in your holding tanks from freezing.
Option #2: Using Compressed Air to Winterize Your RV Plumbing System
If you don’t like the idea of using antifreeze to winterize your travel trailer, here’s how to use compressed air.
Step 1:
First, make sure you have the right materials on hand for how to winterize a camper plumbing system.
- An air compressor
- An adjustable pressure regulator
- A blowout plug that fits into the city water inlet of your camper
Step 2:
Next, make sure you’ve already flushed and drained your black and gray water tanks.
Step 3:
Once that’s complete, drain the freshwater system (if you haven’t already).
Step 4:
Then, bypass the water heater using a pre-installed bypass valve or by installing one yourself.
Step 5:
Attach the air compressor to the city water inlet on your camper. Note that you’ll likely need an adapter to attach the air compressor to the water inlet port. Once you have a tight fit, turn the air compressor on, but keep the pressure below 40 psi, preferably closer to 30, as too much pressure can damage your water lines.
Step 6:
Open each hot and cold faucet and water fixture one at a time. Starting with the fixtures closet to the air compressor and working your way around the camper, open each water fixture until nothing is coming out of the faucet besides air. Don’t forget about your outdoor shower and toilet, as well.
Step 7:
Turn off the compressor and disconnect the hose from the city inlet port.
Step 8:
Pour some antifreeze down your drains and toilet bowl and into your black and gray tanks.
Step 9:
Remove all low-point drain plugs, including the water heater drain plug.
Pro Tip for How to Winterize a Camper: You can’t expect to get every drop of water out of your system using compressed air. Plan to use a cup of antifreeze per water fixture to prevent any remaining water from freezing and causing problems for your camper over the winter.
Step 5: Clean the Camper and the Refrigerator, and Unplug All Your Electronics
It’s essential to thoroughly clean the inside of your camper, including your refrigerator, pantry, stove, closets, and other appliances–especially if you don’t want a pest problem on your hands come spring.
It’s also a good idea to remove any bed sheets, towels, food, and nonperishables from your camper so they don’t get stagnant and stale while your rig is in winter storage. That way, when you open up your camper next spring, it will be clean and ready to go!
Finally, unplug all of the electronics that are currently plugged in inside your camper, including the following:
- TVs
- Stereos
- DVD or Bluray players
- Charging stations for your phone
- Your coffee maker
- The water pump
- Your microwave
- Anything else plugged in throughout the camper
Keep in mind that extreme cold can be brutal on electronics. If you live in an area that sees dramatic temperatures during the winter, consider removing some of those electronics from the camper and storing them in a climate-controlled location throughout the winter.
Step 6: Make Sure Your Propane Is No Longer Connected
Because you won’t be actively living in your camper during the winter, you won’t notice if there’s a propane leak. Therefore, you should disconnect your propane hose, remove the tanks, and store them in a warm, dry area during winter.
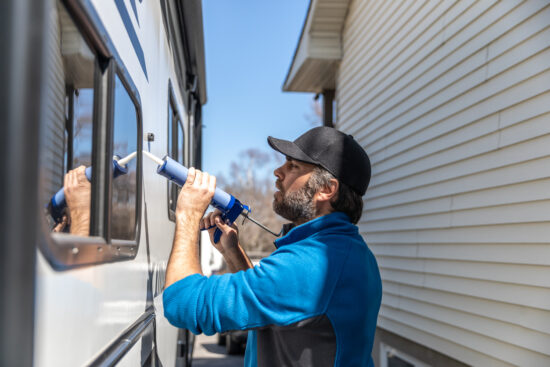
Step 7: Seal All the Gaps
Small gaps and leaks in your camper could lead to big problems over the winter months, when pests may begin to creep in. Seal all the gaps throughout your camper to protect your investment.
Here are some areas to check:
#1: Gaps Around Windows, Doors, and Outlets
The main problem areas concerning pests and water leaks are the caulk joints around your windows, doors, and exterior outlets. Check each of these areas to ensure they’re thoroughly sealed so that nothing can get into your camper from the outside.
#2: Cracks on the Roof
Next, climb on top of your roof to check the perimeter as well as around any vents and pipes protruding through the roof. This is especially important if you’re leaving your camper uncovered, as it will be very prone to leaks.
Step 8: Clean the Awning
Once you’re finished with the roof, the next step is to clean your awning. To do this, fully extend the awning and use a specially purposed awning cleaner to clean the top and bottom of the awning fabric. Spray the cleaner onto the surface of the awning and use a soft scrub brush to wipe it off.
You should also take this time to check your awning for cuts, wear and tear, and cracking and consider replacing it if any of these issues are present.
Step 9: Wash and Wax Your Camper to Have It Looking Its Best
In addition to having a clean RV inside, you also want the exterior washed, waxed, and clean as a whistle. This is especially important before putting your camper into winter storage. Remember, any dust, bugs, and grime that you neglect during winterization will be more of a hassle to remove when bringing your camper out of storage the following year.
Step 10: Choose the Best Location for Your Camper
With your camper fully winterized, your next step is to find a safe and affordable storage location for your rig. Ideally, look for covered and climate-controlled storage to protect your RV from pests, cold weather, hail, ice, rain, and snow. You should also try to find a flat, secure location so your RV doesn’t roll away or fall prey to burglars.
Step 11: Tuck Your Camper in for the Winter
Last but not least, you’re ready to tuck your camper away for the winter. Keeping your camper covered and protected is a good idea whether you’re storing your camper indoors or outdoors. The best way to do this is with a tight, breathable travel trailer cover.
If you’re looking for a safe and affordable location to store your travel trailer, consider using Neighbor, a peer-to-peer storage marketplace for boats, cars, and RVs. Neighbor gives you access to storage locations near you to ensure your camper stays safe and secure until you’re ready to de-winterize and use it next year.