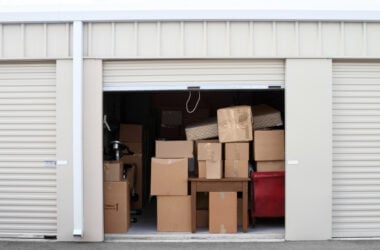


An organized storage unit helps you get the most out of your space. You can find what you need without unloading half the unit, and you’ll be able to fit more into less room, which could mean a smaller unit and lower rent.
A good setup doesn’t take much longer than a bad one. A walkable layout, smart packing, and clear labels do most of the work, and they keep the space easy to use for as long as you need it.
Storage Unit Organization Starts With Prep and Layout
Before you bring in the first box, sweep the floor and check for signs of moisture or pests. Damp patches, discoloration, and a musty smell signal mold. Droppings, gnaw marks, or nesting material tell you that rodents got there first. Flag these to the facility or the host of your storage space.
Once that’s sorted, plan how to load in your stuff so it’s accessible. Good storage unit organization is about being able to walk in, grab what you need, and walk back out.
So, keep a walkway down the middle, and make it wide enough so you can turn around with a box in your arms. In a bigger unit, like a 10×20 or larger, plan for a second aisle so you can reach the sides.
How often you’ll reach for something should decide where it goes, so split your unit into these zones:
- Front: Keep what you’re most likely to need, like tools, extra phone chargers, and warmer jackets if the days are shortening.
- Middle: Try to arrange by category. Having a “kitchen area” helps you find the blender you thought you didn’t need.
- Back: Stash keepsakes and anything you rarely open.
Use Your Vertical Space, Not Just the Floor
Most units give you about 8 feet of height, so put it to work. Free-standing shelves help you stack smaller and more delicate items that might get crushed in a tower of boxes. Sturdy plastic shelving units won’t cost that much.
For boxes, stack the biggest and heaviest at the bottom (more on that below). Keep similar-sized boxes together, so there’s less risk of them toppling.
Pack So Everything Stacks Well
A little care now saves you from facing a crushed lamp (or a mess you can’t identify) when it’s time to open your boxes. A few packing habits that pay off:
- Clear bins beat boxes: You can see what’s inside, and they’re better at keeping out dust and pests.
- Heaviest first: Books and tools go low, pillows and linens go on top.
- Break down furniture: Take apart bed frames and tables, keep the screws and small tools in a plastic bag, then tape each bag to the piece it goes with.
- Fill any dead space: Pack books and small items inside drawers and cabinets that don’t disassemble.
Label Everything and Map as You Go
Labeling is what turns a storage unit into something you can actually navigate. When every box is marked and you’ve got a rough map, you’re in for a 5-minute search instead of an afternoon of lid-lifting. A couple of tricks:
- Label at least 2 sides: A label on top will help you know where to put the box, but you won’t see it when that box is stacked. Label at least two sides and use a thick marker, in case there’s low lighting. And be specific: “pots and lids” rather than “kitchen.”
- Snap a few photos: Taking a visual inventory as you’re loading up saves you from straining your memory a month later.
- Tape a map to the wall: Sketch your zones and mark out important items, so you (or a helpful friend) knows what’s where.
How to Pack the Tricky Stuff
Some things can go straight into a box, but others need a bit more care and effort. Here’s how to handle them.
Furniture
Take apart furniture as much as you can. It saves space and protects the joints, which are the first bits to fall apart under continual weight.
Wrap everything in moving pads or old blankets rather than plastic, which can trap moisture against wood and leave it musty.
Stand flat pieces like table tops and headboards upright along a wall. They take up far less floor space this way, and you can slide bins in front of them so they’re steady.
Electronics
Back up your files, and run devices with batteries dry, because a forgotten battery can leak and ruin the other components.
Pack electronics in their original boxes if you saved them, since this packaging was tailored for protection. Otherwise, wrap each device in a blanket and set it on a shelf, never straight on the floor, where moisture collects.
Coil your cords and put them in a labeled bag taped to the device, so you’re not untangling a mystery knot later.
Fragile items
Wrap glasses, plates, mirrors, and frames one at a time in packing paper or bubble wrap. Fill any space in the box with towels or more paper, since shifts during transit are what actually cause cracks.
Stand plates on their edges, since they handle pressure much better upright. Mark these boxes “Fragile” on every side and keep them near the top of a stack.
Clothes and fabric
Wash and thoroughly dry everything first. Any food or body oils left on fabric can settle in permanently and attract pests.
Fold clothes into sealed plastic bins instead of cardboard, and tuck in a few silica packets or a moisture absorber to keep mildew out.
Anything sensitive to heat or damp
Electronics, wood furniture, and leather all react badly to big temperature swings. Heat warps and cracks them, and humidity above 60% is enough to invite mold.
For these and other sensitive items, like photos, important documents, heirlooms, wine, and artwork, consider a climate-controlled storage space. It’s kept cool and dry year-round.
If you’re storing a full home’s worth for more than a few months, it can be cheaper to rent storage separately: a small climate-controlled unit for your delicates and a standard unit for sturdier stuff.
Already Have a Chaotic Unit? Reset It
You open your unit and find a solid wall of boxes. It happens, especially after a big move. Here’s the fix, step by step:
- Empty it fully: Pull everything out, peek inside, and separate your boxes by room and necessity.
- Sort as you go: Be realistic about what you need, and decide what to keep, sell, donate, or toss.
- Clean the space: Sweep the floor of the unit, wipe the shelves, and check for damp or pests.
- Rebuild by zone: Add more specific labels, and load in again using the layout plan above.
- Check in seasonally: Swing by every few months to rotate items and catch any issues early.
What to Buy Before You Start Organizing
A few basics handle most of the work, and they’ll be useful outside the unit, too. Here’s what’s worth picking up:
- Clear plastic bins: Stick to two or three sizes, so your stacks will lock together.
- Free-standing shelves: They’ve got a small footprint but give you at least three usable levels, which is especially handy in smaller units.
- A tarp or pallet: A concrete floor stays cold and can wick up moisture in winter and humid months, so lay this down first to protect your stuff.
- Furniture pads or old blankets: Protect wood, screens, and corners.
- A thick permanent marker: So you’re glancing at your labels instead of guessing.
- A folding dolly: It saves your back and your time when you’re loading and unloading.
For more tips, our garage and closet organization guides have layouts you can use for your unit.
Good Storage Unit Organization Saves You Money
When a unit is packed well, the same belongings fit in less space. And when you can rent a 5×10 rather than a 10×10, the savings add up. If the right choice isn’t clear, our size guide walks you through it.
Find a Storage Space Close to Home
Good organization only works if you have the right space to begin with. That’s where Neighbor comes in. In a single search, you can compare traditional storage units from national brands with garages and spare rooms hosted right down the road.
Filter listings by distance, price, and size, then browse photos and reviews until one feels right. Message the host directly with any questions, and once you’ve requested to book, they’ve got 24 hours to approve.
Many hosts knock down the price for your first month, sometimes by half. And since every rental is month to month, you’re never stuck in a long-term lease. One thing to plan around: you’re billed for the full month even if you only need 3 weeks.
Renters on Neighbor typically pay up to 50% less, compared with traditional storage. With 30,000+ unique locations listed and a 4.9-star average rating from 689,000+ reviews, you’re bound to find solid options.
Search for storage near you, or call us to talk it over.
Frequently Asked Questions
How do you organize a storage unit for easy access?
To organize a unit for accessibility, leave a walkway down the middle and put the items you’re most likely to need near the front. Group everything else by category, and label boxes and bins with their specific contents. Make sure these labels are visible from the doorway or your path through the unit.
How do I organize a small storage unit?
To organize a smaller unit, make the most of your vertical space. Use same-sized bins that stack cleanly and lock together. Pack everything you can onto free-standing shelves, and into drawers and cupboards.
Are plastic bins or cardboard boxes better for storage?
Plastic bins are better than cardboard boxes for most storage. They seal out dust and pests, and they stack without collapsing, while cardboard can draw in moisture and sag over time. Clear bins also make access and organization easier by showing their contents.
How do you keep track of what’s in your storage unit?
To keep track of what’s in your storage unit, you could number each box and list its contents in a note on your phone. Some people find it easier to take photos as they load in, and drawing a map of the unit and taping it near the door also helps. It really depends on what kind of inventory you’re more likely to check.